Installing mods on your DayZ server is a great way to enhance gameplay by adding new features, items, weapons or vehicles. Mods allow you to completely change the game’s atmosphere and introduce unique elements that will attract players and make gameplay more engaging. In our intuitive game server panel, the mod installation process has been simplified to the maximum – you can install them automatically with just one click. In this guide, you will learn how to install mods on your DayZ server using our automatic Steam Workshop mod installer.
Installing Workshop mods
Installing mods from Steam Workshop only takes a few simple steps:
1. Go to the control panel and select “Workshop” tab.
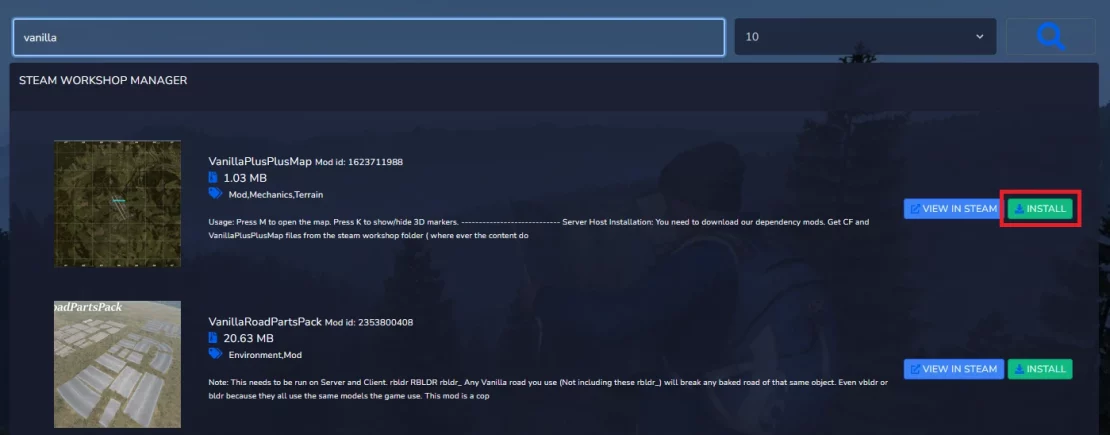
2. Search by name for the mod you want to install.
3. Once you find it, select “INSTALL”.

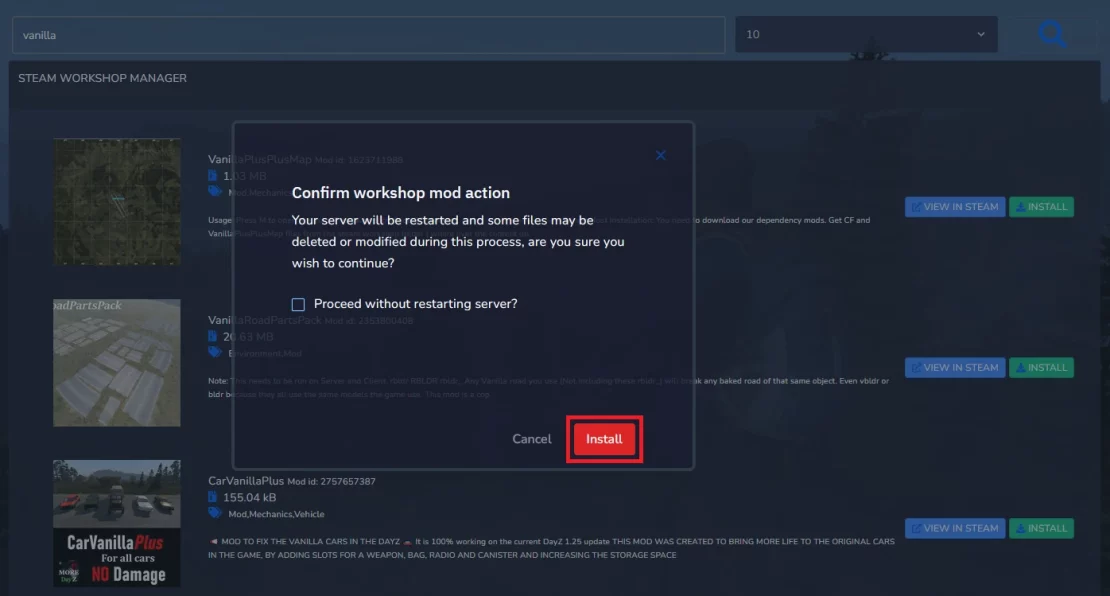
4. Confirm the installation in the new window. Here you can also select the option to install without restarting – we recommend selecting it if you want to install a few more mods. In such a situation, install with a restart the last one in them.

After installing mods and restarting the server, you will be able to check the installed mods in the “Startup” tab.

Uninstalling Workshop mods
Uninstalling mods can also be done with one click:
1. Select “Workshop” tab and find mod you want to uninstall.
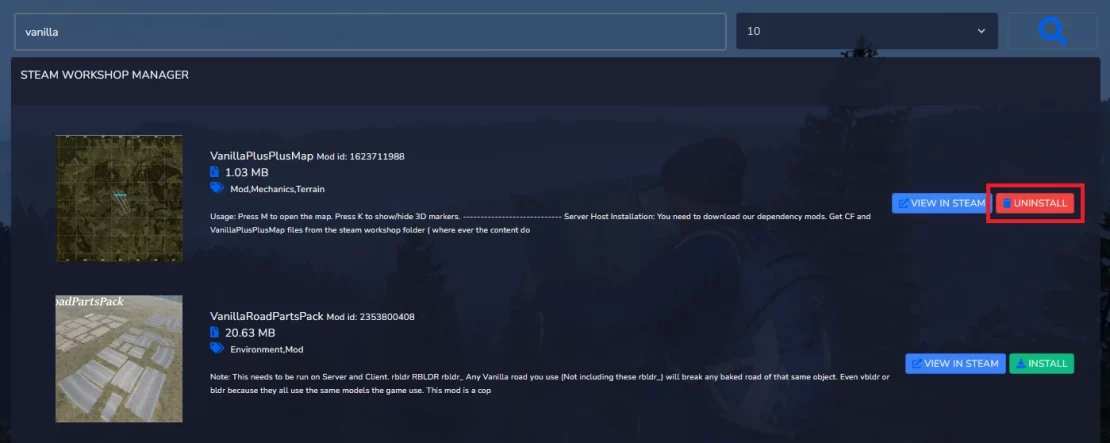
2. Once you find it, click “UNINSTALL”.

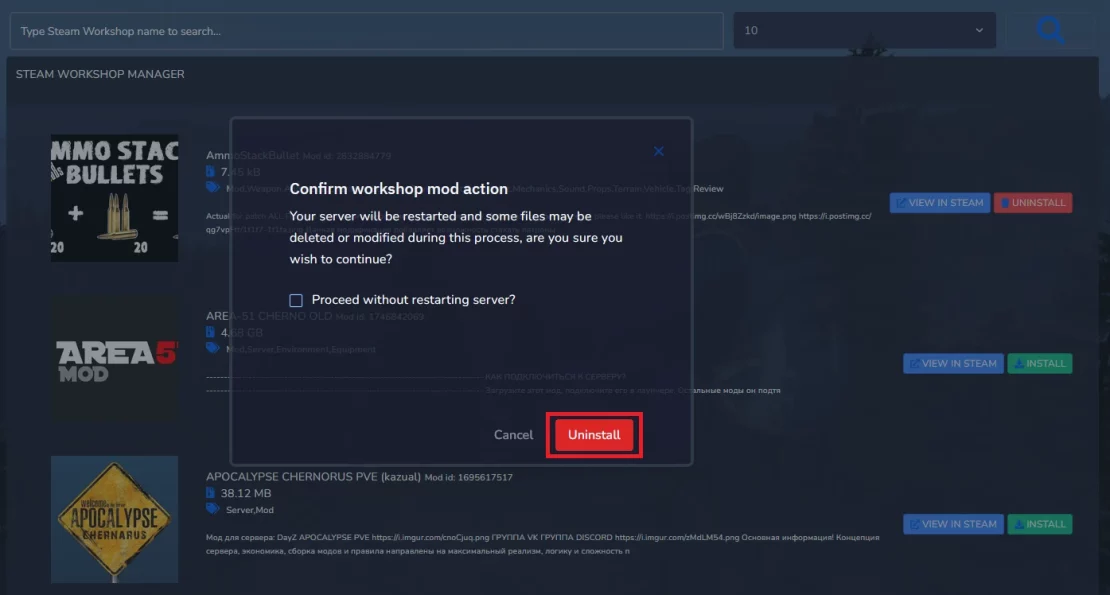
3. Confirm your selection in the new window. Similar to the installation, you can choose to uninstall without restarting the server. We recommend choosing this option if you want to uninstall several mods at once.

We hope that our intuitive web interface has allowed you to configure DayZ server easily. If you want to ask us any questions, feel free to contact us via e-mail, ticket or live chat!

