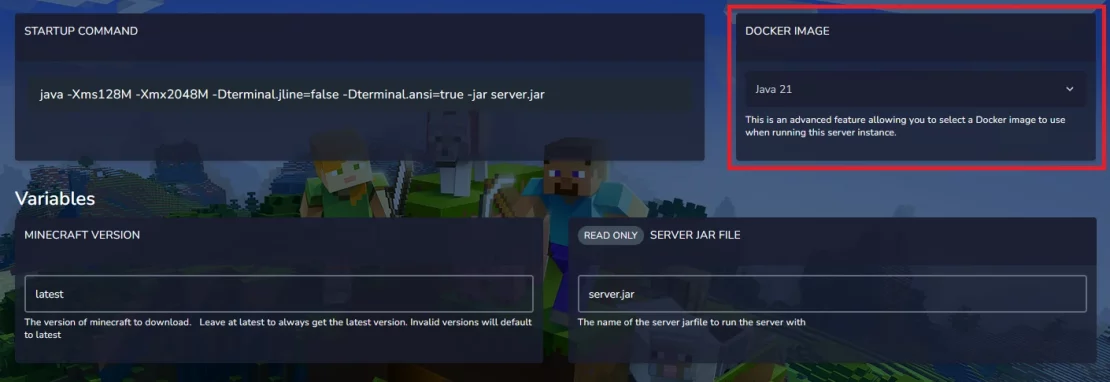
Changing the Java version is crucial to ensure compatibility with the selected game version and optimal server performance. Different editions of Minecraft require specific Java versions, making it essential to adjust the server environment accordingly. Using the wrong Java version will prevent the server from running. In this guide, we will explain how to change the Java version for your Minecraft server using our intuitive game server panel.
How to change Java version
1. In our game server panel, locate the “Startup” tab.
2. In the upper right corner you should find a box that allows you to adjust your Java version. Select the Java version that is compatible with your Minecraft server version. If you don’t know which version to choose, use the table below.

3. Navigate “Console” tab and click “Restart” to restart Minecraft server.
Use this table to verify which version of Java you need:
| Java Version | Minecraft Version |
| Java 8 | 1.8 – 1.11 |
| Java 11 | 1.12 – 1.16.4 |
| Java 16 | 1.16.5 |
| Java 17 | 1.17.1 – 1.19.2 |
| Java 21 | 1.20+ |
We hope that our intuitive web interface has allowed you to configure your Minecraft server easily. If you want to ask us any questions, feel free to contact us via e-mail, ticket or live chat!

