
Introduction
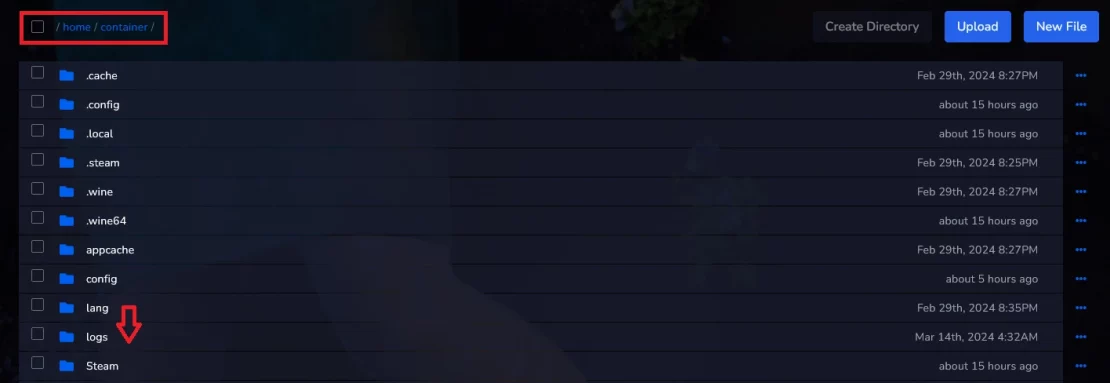
Servers4Gamers gives customers full access to server files, enabling any level of game server personalization. Upon logging into our control panel, you’ll notice a range of tabs, including the “Files” tab, which will help you manage your game server. Our users can easily create new files and folders directly from the web interface, which is useful for configuring servers and mods. The tab also allows for the editing of existing text files, facilitating the easy modification of server configuration files. From the “Files” tab, you can also delete unnecessary files and folders, perform bulk operations on files, and change file permissions directly from the interface.
Navigation
- How to create a new server file
- How to create a new server file directory
- How to move a server file
- How to rename a server file
- How to archive a server file
- How to unarchive a server file
- How to upload a server file
- How to delete a server file/directory
- How to download a server file
- How to change a server file permission
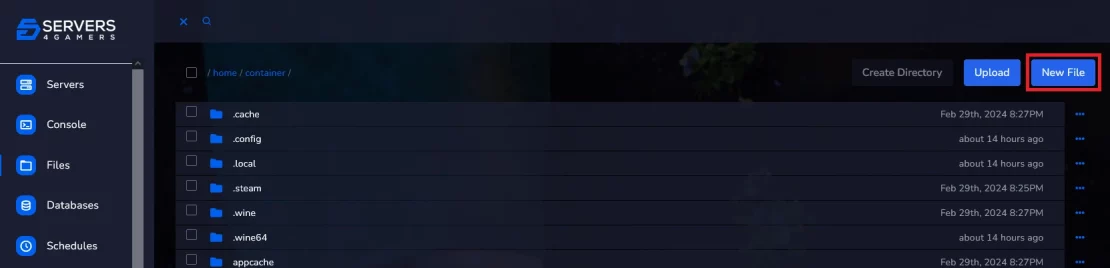
1. How to create a new server file
In the upper right corner of the window, select “New File“
A new window will appear for the content you want to include in the file. Enter the text and, optionally, select the type of markup highlighting (JSON, XML, etc.) and confirm the changes with the “SAVE CONTENT” button

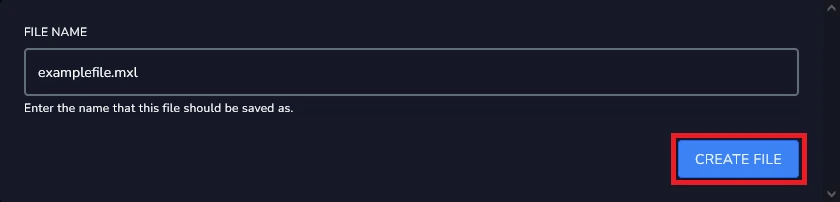
In the new floating window, enter a file name and confirm your decision with the “CREATE FILE” button
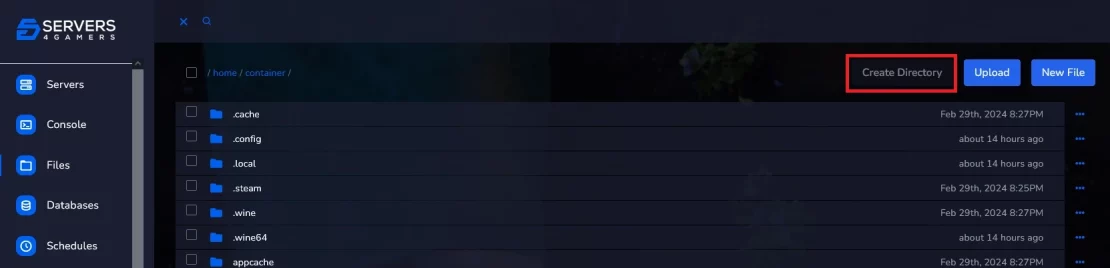
2. How to create a new server file directory
In the upper right corner of the window, select “Create Directory“
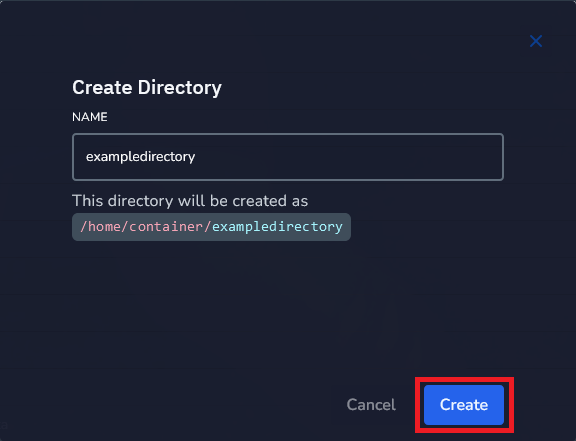
Enter directory name in the new floating window and select “Create“
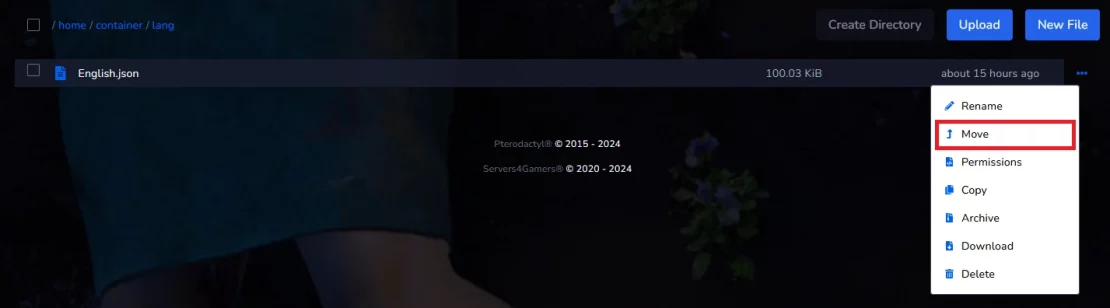
3. How to move a server file
In this example, we will move the English.json file from the “lang” folder to the “logs” folder
Click on the three dots to the right of the file. From the task menu, select “Move“
In the “FILE NAME” window, enter the following phrase:
../<other_folder_name>/<file_name>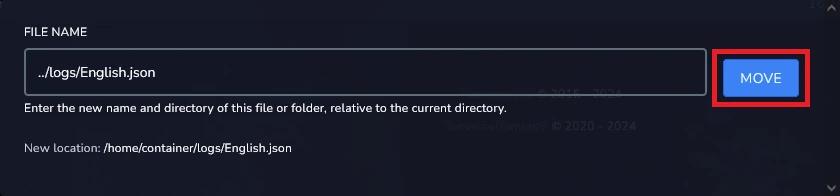
Select “MOVE” to move the file
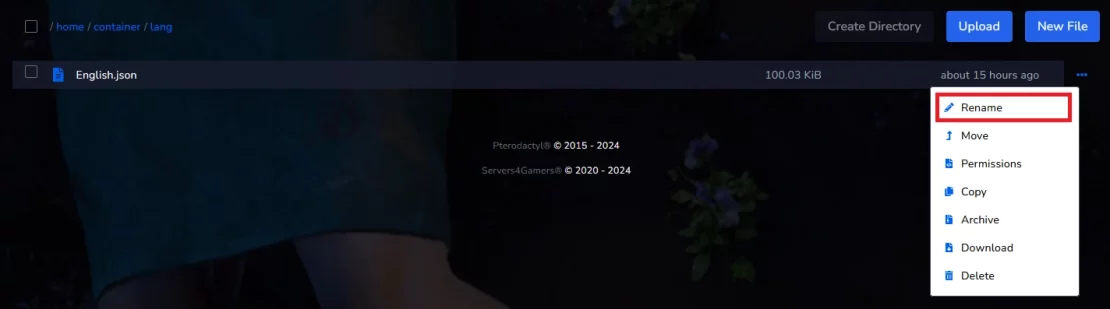
4. How to rename a server file
Click on the three dots to the right of the file. From the task menu, select “Rename“
Enter new name and select “RENAME“

5. How to archive a server file
Click on the three dots to the right of the file. From the task menu, select “Archive“
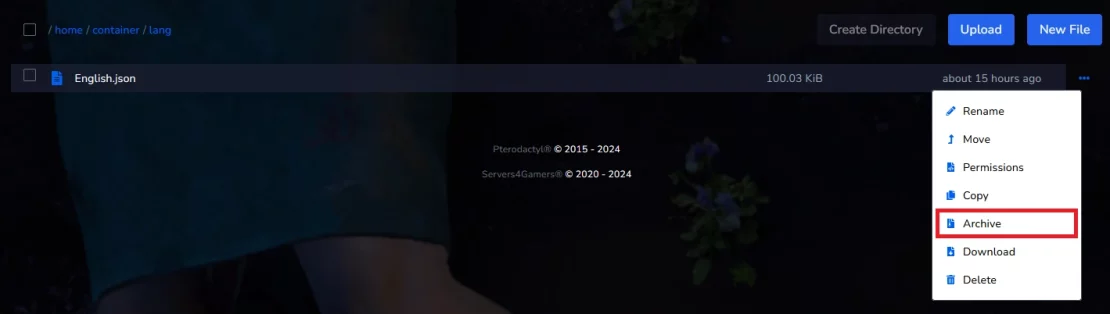
Now, your file should be archived. You will see it with .tar.gz extension

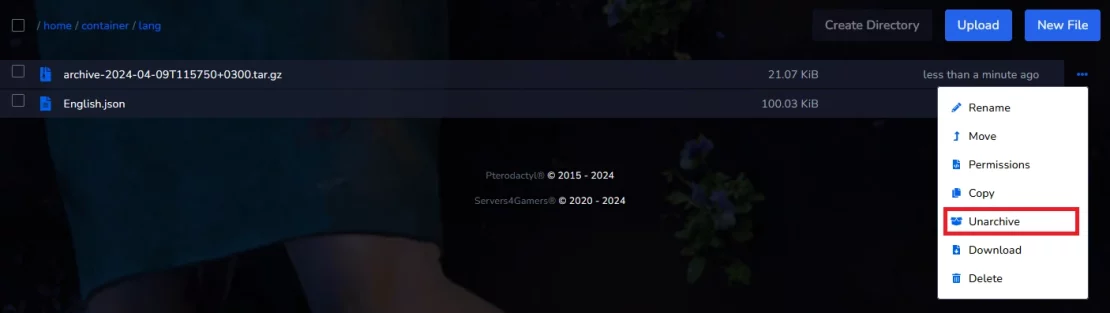
6. How to unarchive a server file
Select three dots on the right of archived file and click on “Unarchive“
7. How to upload a server file
If you want to upload file to your server, click “Upload” and select appropriate file from your computer
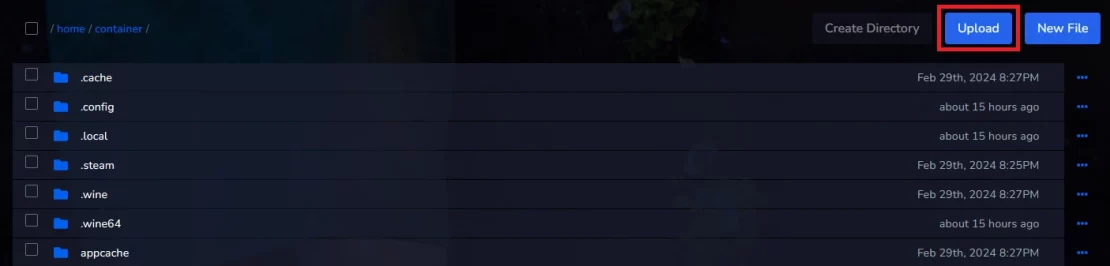
If you want to upload a file larger than 100 MB, you must use the SFTP protocol!
Uploading files this way requires installing appropriate software (WinSCP, FileZilla, etc.) – once you install it, you can freely log in to your server with the data provided in the “Settings” tab (SFTP DETAILS section)
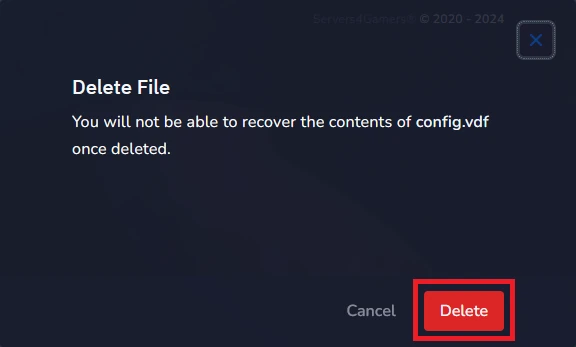
8. How to delete a server file/directory
Click on three dots and select “Delete” option
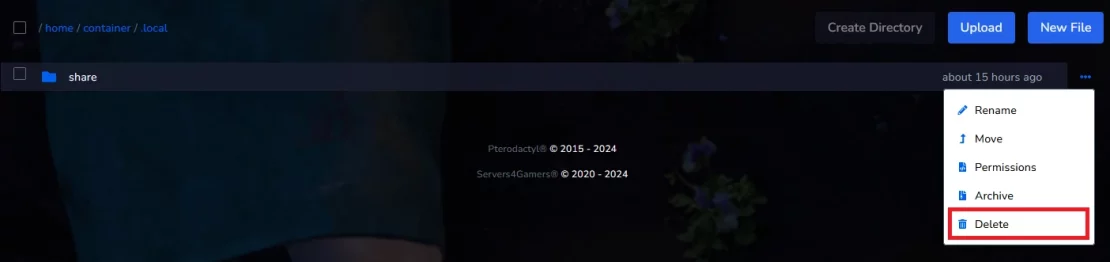
Confirm your choice with “Delete” button
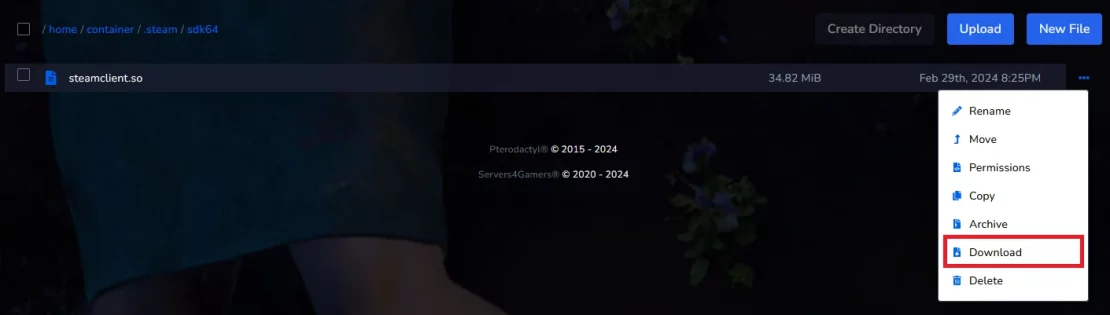
9. How to download a server file
Select three dots on the right of file and click on “Download“
10. How to change a server file permission
Select three dots, then select “Permissions“
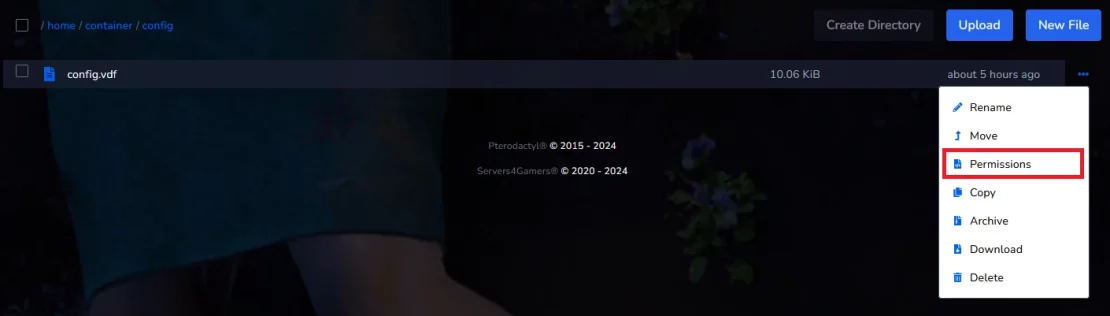
You should see a new floating window – this is place to define numeric file permission. Approve with “UPDATE” button
https://en.wikipedia.org/wiki/Chmod

Permission of file will be updated immediately after confirming.
Our intuitive interface will allow you to easily manage your server’s files. If this guide did not answer your questions about managing server files, feel free to write to our support via e-mail, live chat or ticket!