How to create a customer account and order a game server
Our platform is designed with gaming enthusiasts in mind, offering reliable solutions tailored to your needs. Here, you will find detailed instructions on account registration, server selection and ordering, as well as available payment methods. Each step is thoroughly explained so you can quickly and easily start using our services.
Create customer account
1. Go to our website servers4gamers.com.
2. In the main right corner you will find the “CLIENT AREA” option.

3. Here you can log in to your existing customer account or create a new one. If you already have an account, skip the registration steps.
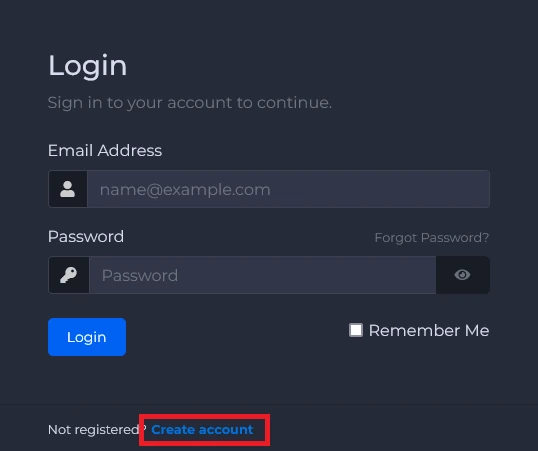
4. Create a new account.
Enter your name, surname and e-mail address.

Then, enter your current home address.

Enter the password. If you don’t have an idea for a secure password, you can generate one by clicking “Generate Password”.

At the bottom of the form you will find an option that will allow you to join (or not) our mailing list.

Accept the terms of our website and select “Register”.
The current Terms of Service can be found here.

After successful registration, go to your e-mail box. You will receive a message from us to verify your e-mail address.
Order your game server
1. In the main menu, select the “GAME SERVERS” tab. You should see a list of options, including game servers, Minecraft servers and an option dedicated to people who want to test them – “Freetrial”.

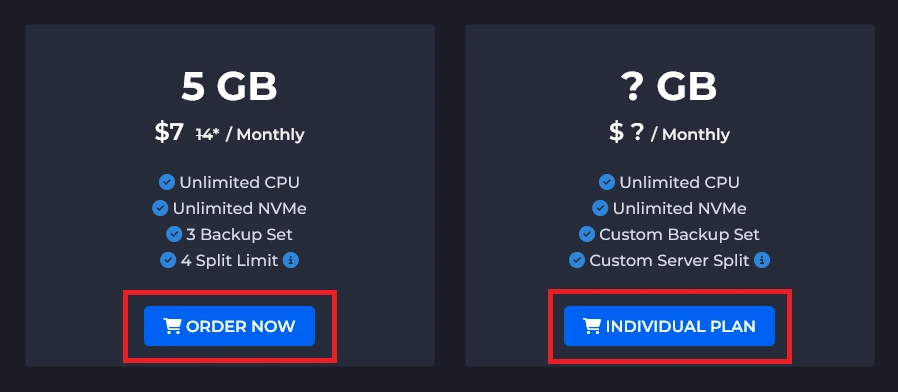
2. Select server plan.
After selecting the server, you can choose the appropriate plan for your server and order it by clicking “ORDER NOW”. There is also an option of an individual plan in which you can adjust the amount of resources you need. In this case, select “INDIVIDUAL PLAN”.
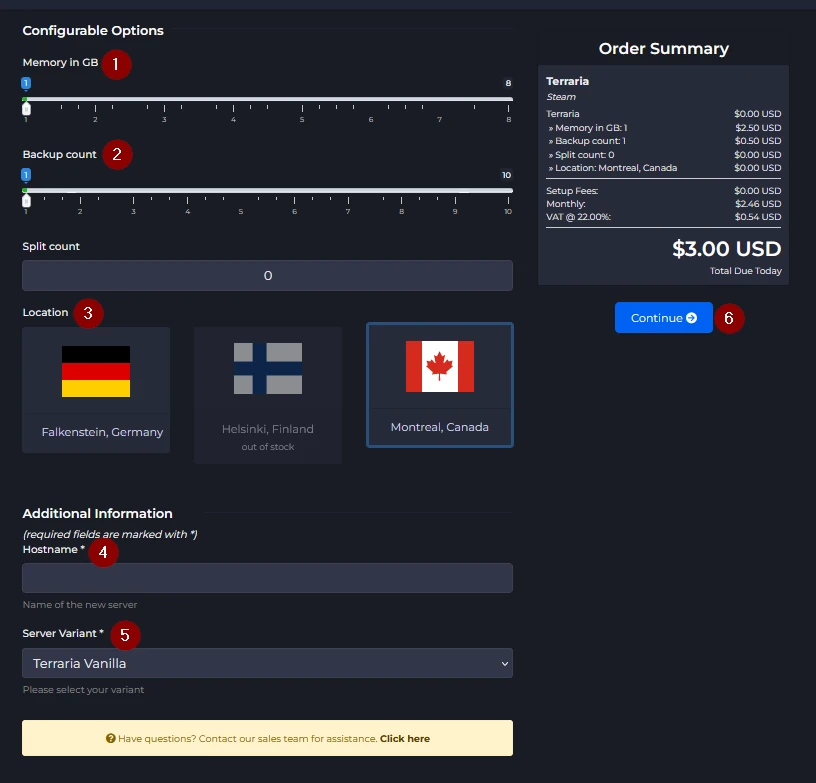
3. Configure your server.
Choose the appropriate number of backups (2) and RAM (1) memory (you don’t have to do this if you have chosen a ready-made server plan). Then, select your server location (3) and enter the server name (4). The last option (5) applies only to a few selected servers, such as Terraria or Valheim – select the server version (for example, the Terraria server is available in the tShock, Vanilla and tModLoader versions). In the end, just select “Continue” (6).
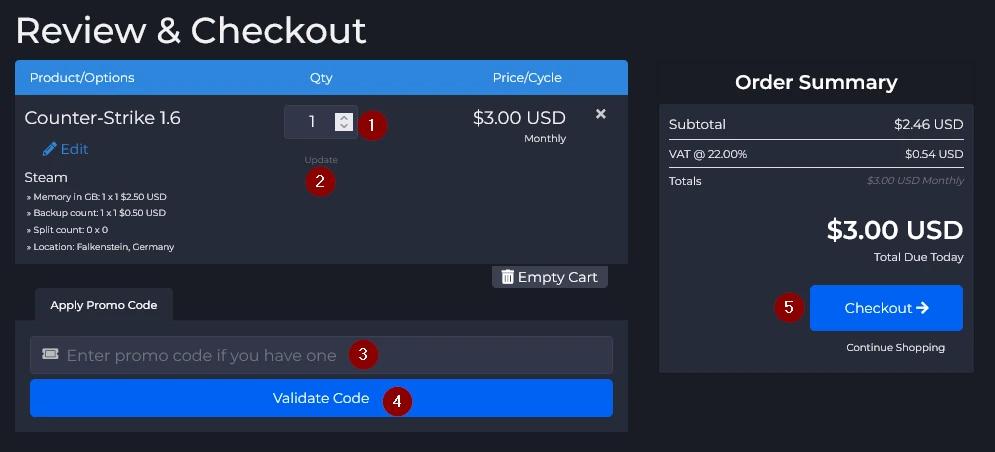
4. Add additional servers and promotional codes.
Here you can multiply the number of previously configured servers (so, if you want to have, for example, two identical servers, change the number of servers (1) and confirm with the “Update” button (2).
If you have a promotional code, enter it in the appropriate place (3) and confirm by clicking “Validate Code” (4).
Select “Checkout” (5) to proceed.
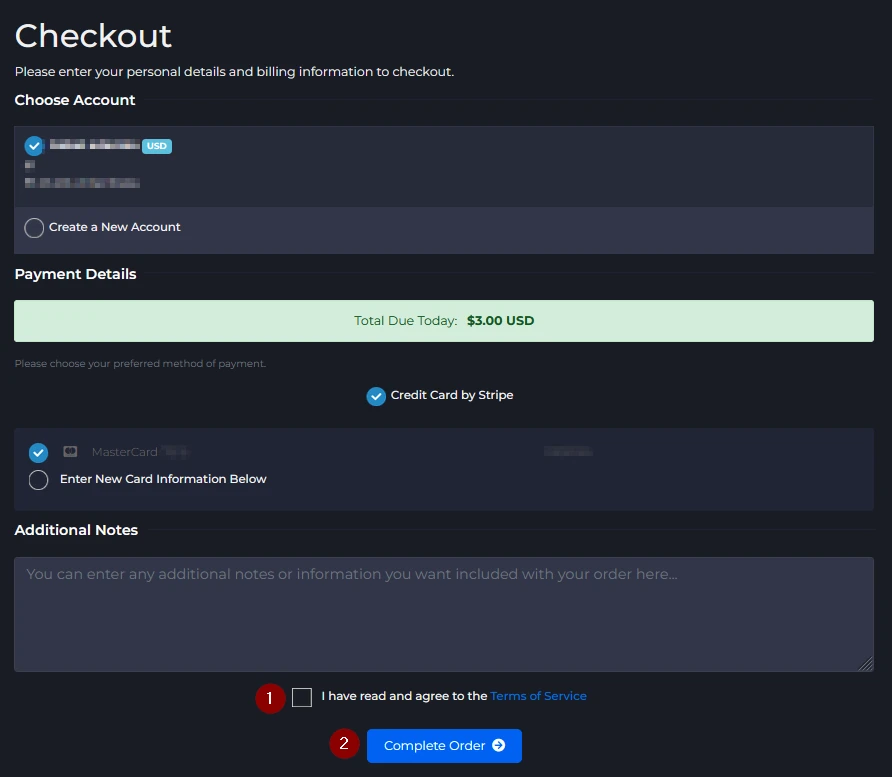
5. The last step is payment. In the “Checkout” window, select your customer account and payment method. If you haven’t added the card to your customer account yet, you can enter the card number here. Typically, your account and payment method will be selected automatically.
Confirm the Terms of Service (1) and click “Complete Order” (2).
If your payment was successful, you should see an invoice for your server.
Additionally, the installation of your server on our control panel has just started. If you rent a server from us for the first time, you will receive an e-mail with access to the game server panel.
We hope that our intuitive guide has allowed you to order game server easily. If you want to ask us any questions, feel free to contact us via e-mail, ticket or live chat!
