Installing modifications on the Don’t Starve Together server can bring many benefits and diversify the gameplay. Modding allows you to add new items, animals or biomes, which can add a lot of fun when discovering new elements of the world.This guide will walk you through the steps needed to successfully install mods on your server, ensuring a smooth and enjoyable gameplay experience.
Follow these steps to know how to install Don’t Starve Together modifications:
1. Access server files
Go to the server panel and search for your Don’s Starve Together server on the server list. Click on it – you should be redirected to the “Console” tab. Navigate “Files” tab to get access to the server files and directories.
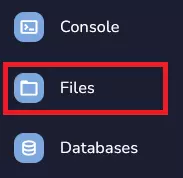
2. Search for dedicated_server_mods_setup.lua
Once you are in a “Files” tab, try to find dedicated_server_mods_setup.lua file. Open this file.

Inside this file you will find tips on how to install modifications on server. All lines are preceded by comment characters (–), so the installation file will ignore those lines. In this installation file you will add the ID of the modifications selected by you.
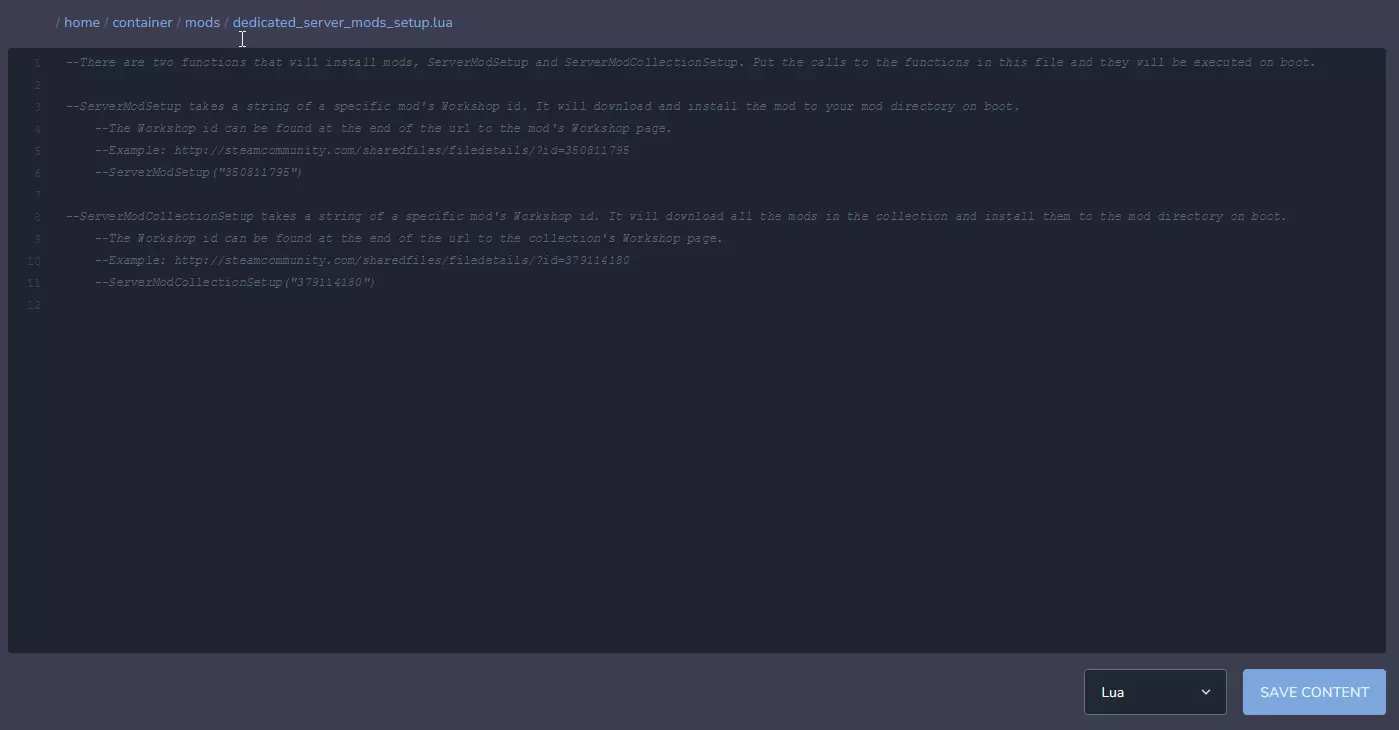
3. Find modification you want to install on your server
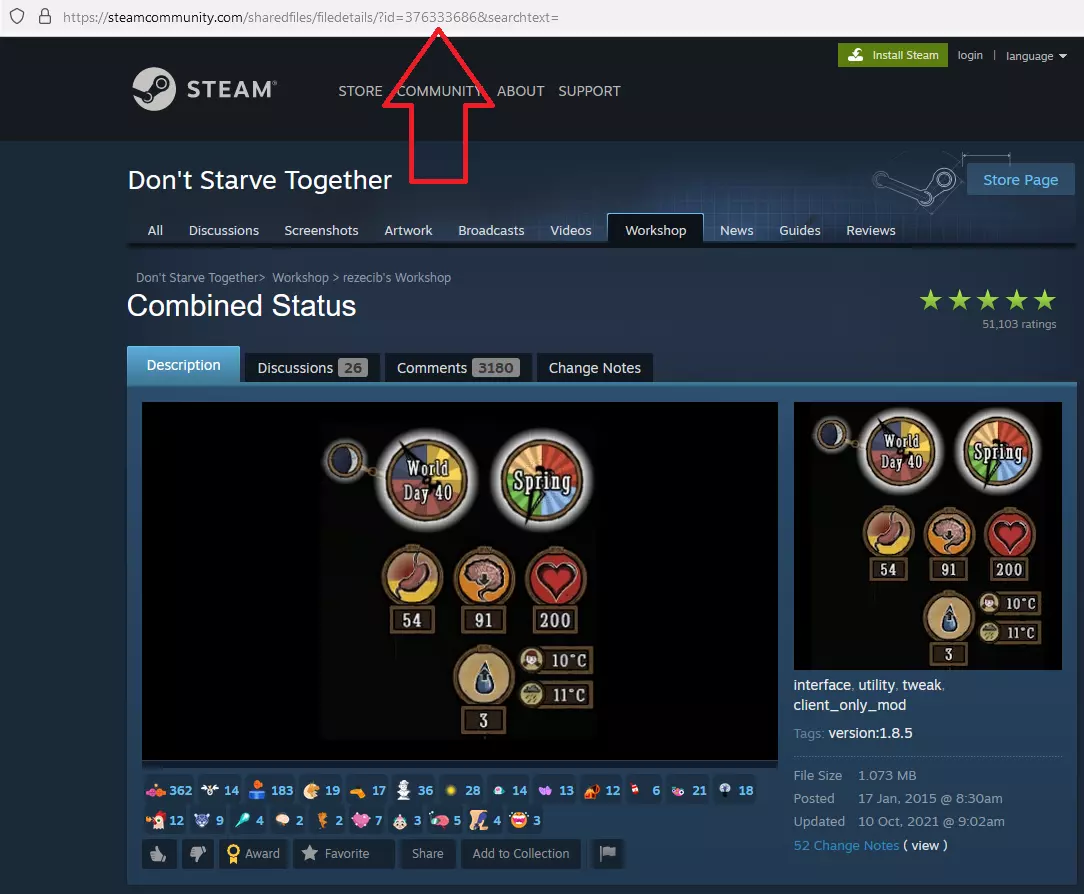
When you finally found the modification, it’s time to copy it’s ID. You can find modification ID in the website address. In example showed on image below, you should copy only 376333686.
4. Add Mod IDs
To add a modification to the server, first go to the file dedicated_server_mods_setup.lua. Add the following line to the file (an example of the added modification is in the image). Remember to replace “ID number” with the previously copied ID.
ServerModSetup("ID number")
Add new modifications in the same way, adding another line (each mod on separated line!).

You can add Workshop Collection too. Copy this line and paste like on the image below:
ServerModCollectionSetup("Workshop Collection ID")Remember to replace “Workshop Collection ID” with the real collection ID copied from the link.

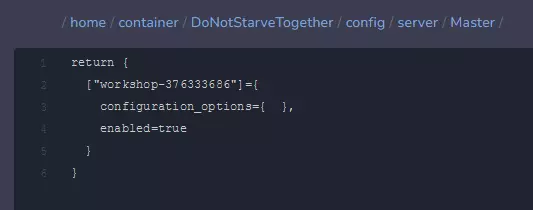
5. Navigate “Master” directory
Once you are in a “Files” tab, follow this path: /home/container/DoNotStarveTogether/config/server/Master
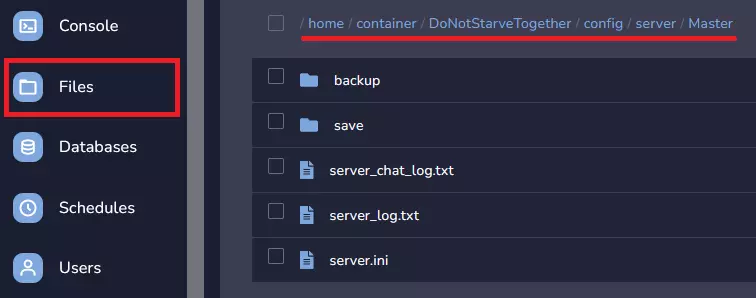
6. Create a new file
Create a new file in the “Master” directory by clicking on “New File” button in the right upper corner.

When you are inside the new file, paste this code sample inside:
return { ["workshop-####"]={ configuration_options={ }, enabled=true } }You need to to replace “####” with modification ID.
7. Finish creating file
Click on the “Create File” button in the right bottom corner.

You should see new window. Enter the name of file modoverrides.lua and approve it by “Create File”.

8. Restart your Don’t Starve Together server
After all changes you need to confirm it. Navigate “Console” tab in your server panel, then click on “Restart” button to restart your server.
Are you looking for answers to other questions? Use our guides for the Don’t starve Together server:
How to connect to a Don’t Starve Together server
How to configure a Don’t Starve Together server
How to create token for a Don’t Starve Together server
How to become an admin of a Don’t Starve Together server
How to ban players on a Don’t Starve Together server
How to set custom world generation on a Don’t Starve Together server
How to enable caves on a Don’t Starve Together server
We hope that our intuitive web interface has allowed you to manage your Don’t Starve Together server easily. If you want to ask us any questions, feel free to contact us via e-mail, ticket or live chat!
This tutorial will show you how to install Don’t Starve Together mods

