
Whitelist is an extremely useful mechanism on a Valheim server that allows you to choose which players will be granted permission to connect to your server. Other players who are not on this list will not be able to connect to the server. To add players to the whitelist you will need to know the SteamID64 of eligible players. Read the guide below to learn step by step what to do.
How to add whitelist
1. Stop your server
Go to the server panel and find your Valheim server. You should be redirected to the “Console” tab where you can stop your server with “Stop” button.
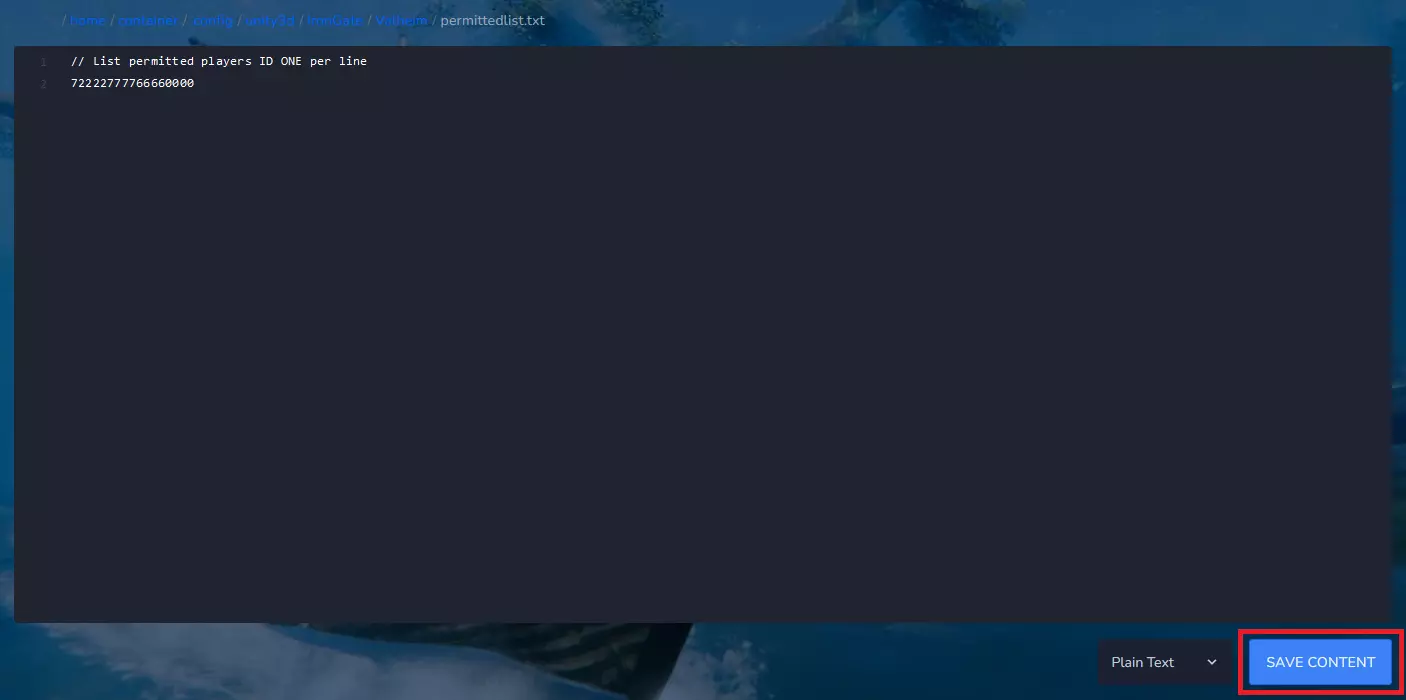
2. Find permittedlist.txt file
Now, when you have stopped your server, go to the “Files” tab. Follow this path: /home/container/.config/unity3d/IronGate/Valheim/permittedlist.txt
3. Add players’ SteamID
Open permittedlist.txt file and type in players IDs. You can add more than one player to your server, just remember to type in each Steam64ID in the separated line.

4. Save changes
Click on “SAVE CONTENT” button to save all previously done changes.
5. Start your server
Go to the “Console” tab and click on “Start” button to restart your server.
If you change your mind and want to remove someone from the whitelist, simply stop your server, remove the ID from the list and restart the server.
We hope that our intuitive web interface has allowed you to manage your Valheim server easily. If you want to ask us any questions, feel free to contact us via e-mail, ticket or live chat!
This tutorial will show you how to add players to a whitelist on a Valheim server