
Install mods on your Barotrauma game client
You can install mods on your client in a few simple steps:
1. Launch Steam application.
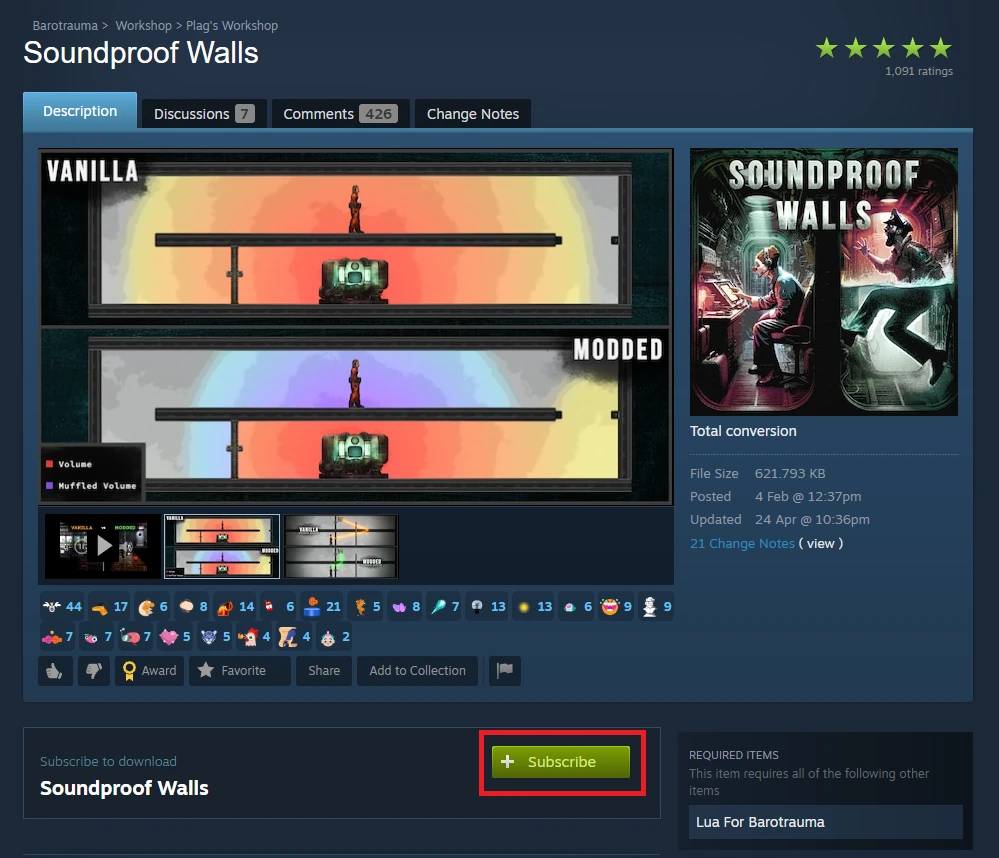
2. Go to the Steam Workshop and find mods you want to install.
3. Once you have found one, click “Subscribe” button.
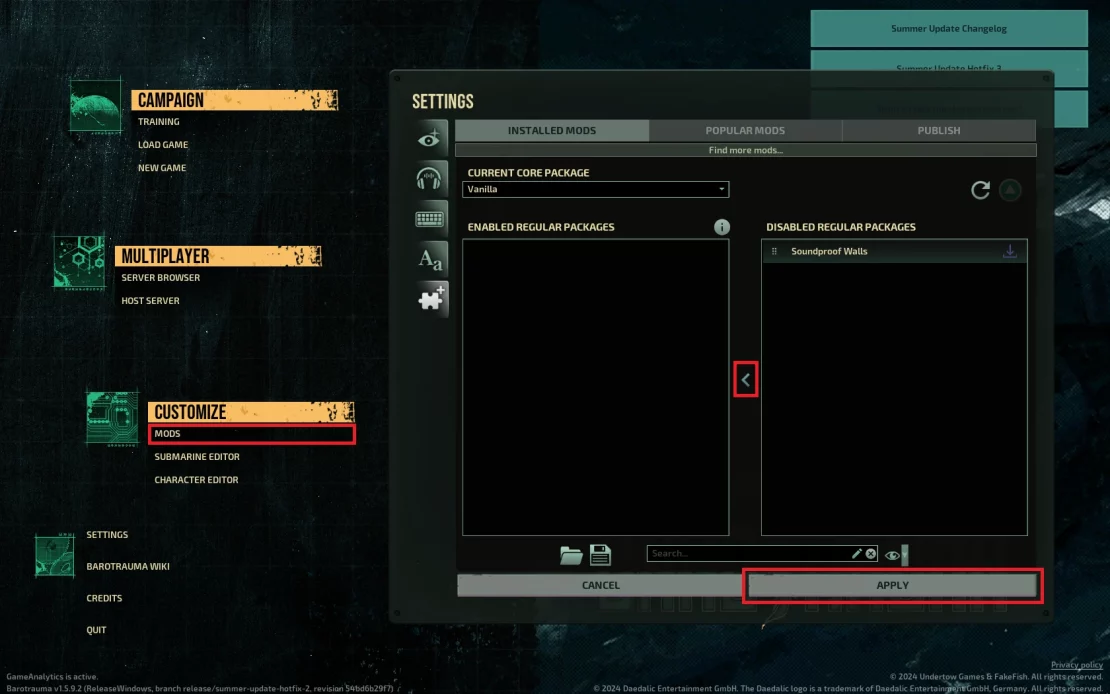
4. Launch Barotrauma game and select “MODS”.
5. You should see two sections – “ENABLED REGULAR PACKAGES” and “DISABLED REGULAR PACKAGES”. Move your subscribed mods from the “disabled” category to “enabled”. Once moved, click “APPLY”.
After the move, there may be an additional mod called “Lua For Barotrauma” – if this happens, please move it to the “enabled” category as well.
Install mods on your Barotrauma server
1. Find installed mods on your local computer.
Users/<Username>/AppData/Local/Daedalic Entertainment GmbH/Barotrauma/WorkshopMods/Installed2. Copy mod folder, for example to your desktop, and compress it to .zip.
3. Go to the control panel and access server files.
4. Go to “LocalMods” and upload the previously compressed folders.
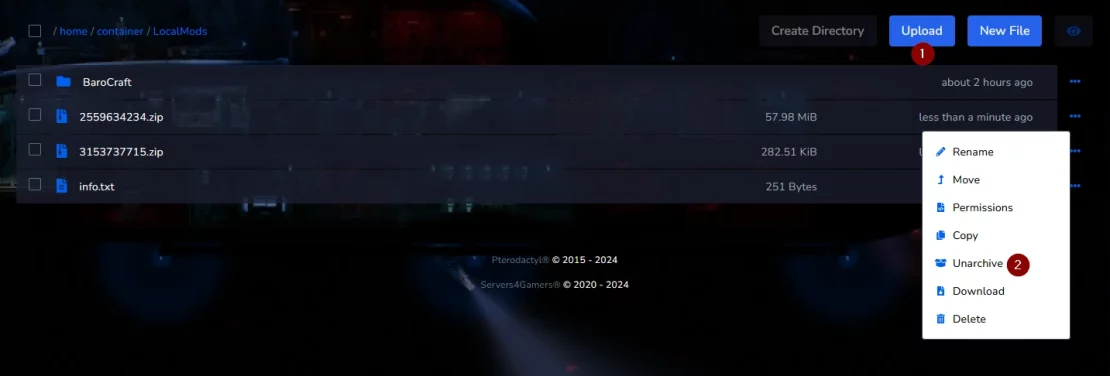
5. Unarchive mods directories.
6. Edit “config_player.xml” file.
/home/container/config_player.xmlScroll to the bottom of the file and find <regularpackages/>. Delete this line.
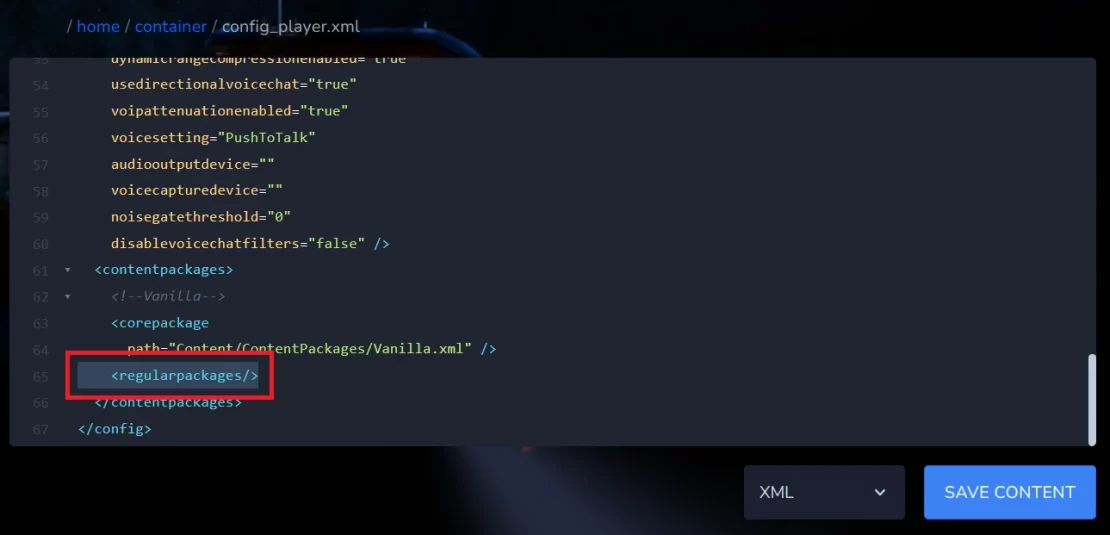
In place of the deleted line, paste the following lines (in the example I’ve given I’ll add two modifications – if you want to add more, just paste an additional <package path=”LocalMods/<ModSteamID>/filelist.xml” /> line).
Remember to replace <ModSteamID> with mod ID.
<regularpackages>
     <package path="LocalMods/<ModSteamID1>/filelist.xml" />
     <package path="LocalMods/<ModSteamID2>/filelist.xml" />
</regularpackages>
7. Restart server.
We hope that our intuitive guide has allowed you to manage your Barotrauma server easily. If you want to ask us any questions, feel free to contact us via e-mail, ticket or live chat!
