Zombie spawn rate is one of the most important parameters you can edit on your Project Zomboid server. As a server administrator, you can adjust the difficulty of the game to match the skill level of your player community by setting one of six possible choices – including 0.0, which completely eliminates zombies from the map. In this guide, you will learn step by step how to change the zombie spawn rate on your Project Zomboid server.
How to change zombie spawn rate
1. Go to control panel and select your Project Zomboid server.
2. Go to the “Files” tab to access the server files.
3. Open the “main_SandboxVars.lua” file located here:
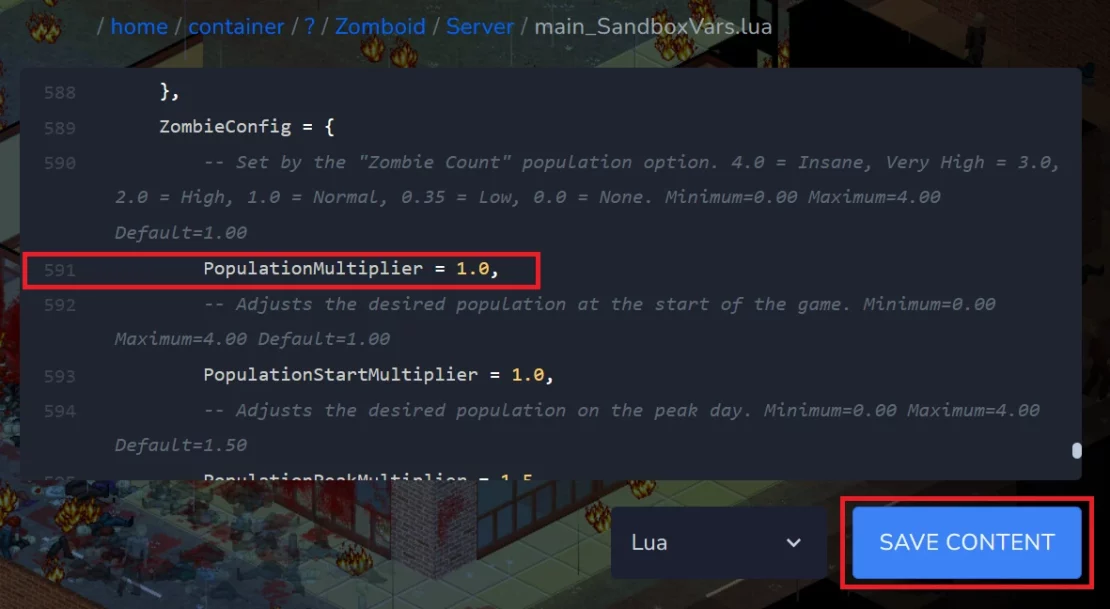
/home/container/?/Zomboid/Server/main_SandboxVars.lua4. Find the “Population Multiplier” located in the “Zombie Config” section.

5. Change the zombie spawn rate to a value of your choice. In the table below you will find all available values. Remember that the value cannot be less than 0.0 or greater than 4.0. Select “SAVE CONTENT” to save changes.
| Spawn Rate | Value |
| 0.0 | None |
| 0.35 | Low |
| 1.0 | Normal |
| 2.0 | High |
| 3.0 | Very High |
| 4.0 | Insane |
6. Go to the “Console” tab and select “Restart” to restart your Project Zomboid server.
Looking for an answer to another question? Use our guides to find out:
We hope that our intuitive web interface has allowed you to manage your Project Zomboid server easily. If you want to ask us any questions, feel free to contact us via e-mail, ticket or live chat!

