


The Project Zomboid server configuration gives you full control over the game world, which allows you to adapt it to the individual needs of players and the server owner. A person with administrator rights can change parameters such as the password, number of players, map and many others. It is possible to adjust the most detailed gameplay elements such as the frequency of zombie occurrence, the availability of resources on the map and even the rules regarding character death.
How to configure your server
1. Stop your server
Open our server panel website in your favorite browser. Navigate Project Zomboid server on the server list and click on it. You should be redirected to the “Console” tab where you can stop your server by clicking on “Stop” button.
2. Perform basic configuration
Once your server is stopped, you can go to the “Startup” tab. This tab contains the most important parameters of your server – you can change them without editing the configuration file. The table below shows all variables you can change in “Startup” tab.
| VARIABLE | DEFAULT VALUE | DESCRIPTION |
| Auto-Update Server | ON | Enable/disable auto-updating after each restart |
| Server Name | default hostname | Assign name for your server |
| Max Players | 16 | Set maximum number of players allowed on your server |
| Server Password | – | Set server password if you want to select who has access to your server |
| Admin Password | password | Set admin password to obtain administrator rights |
| Steam Beta Branch | – | Select which beta branch you want to install. When you want to install normal branch left blank |
| Public | ON | Enable/disable server visibility on server list |
| Welcome Message | Welcome on my server! | Set welcome message for players joining your server |
| Ping Limit | 400 | Set ping limit for players joining your server |
| Map | Muldraugh, KY | Select map on which you want to play |
| PvP Enabled | ON | Enable/disable PvP option |
| Pause Server When Empty | ON | Select if you want to pause your server when nobody is online |
| Public Description | – | Assign description for your server (it will be visible in-game browser) |
| Admin Username | admin | Set admin username |
3. Perform more advanced configuration
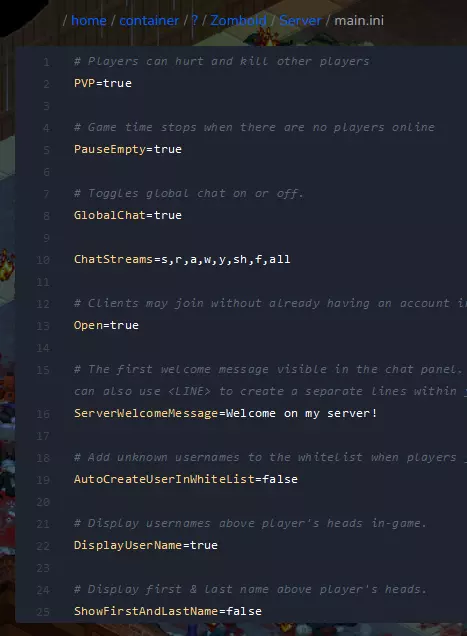
If you are not satisfied with the result of the configuration carried out in the “Startup” tab, nothing stops you from changing more advanced elements of the game. You can do this by editing main.ini file.
Go to the “Files” tab in your server panel to access server files. Follow this path to find main configuration file: /home/container/?/Zomboid/Server/main.ini
4. Restart your server
After making changes to your server, it must be restarted for everything to work properly. Come back to the “Console” tab and click on “Restart” button to restart your server.
Looking for an answer to another question? Use our guides to find out:
We hope that our intuitive web interface has allowed you to manage your Project Zomboid server easily. If you want to ask us any questions, feel free to contact us via e-mail, ticket or live chat
This tutorial will show you how to configure Project Zomboid server
