Plugins allow you to significantly expand the capabilities of your Valheim Plus server. Thanks to them, administrators can adjust various server parameters, adapting it to the individual needs of the most demanding players. Plugins add new content, presenting completely new challenges and adventures for players. In this guide, you will learn how to upload plugins to your Valheim Plus server step by step.
How to upload plugins
1. Make sure you have installed BepInEx on your server.
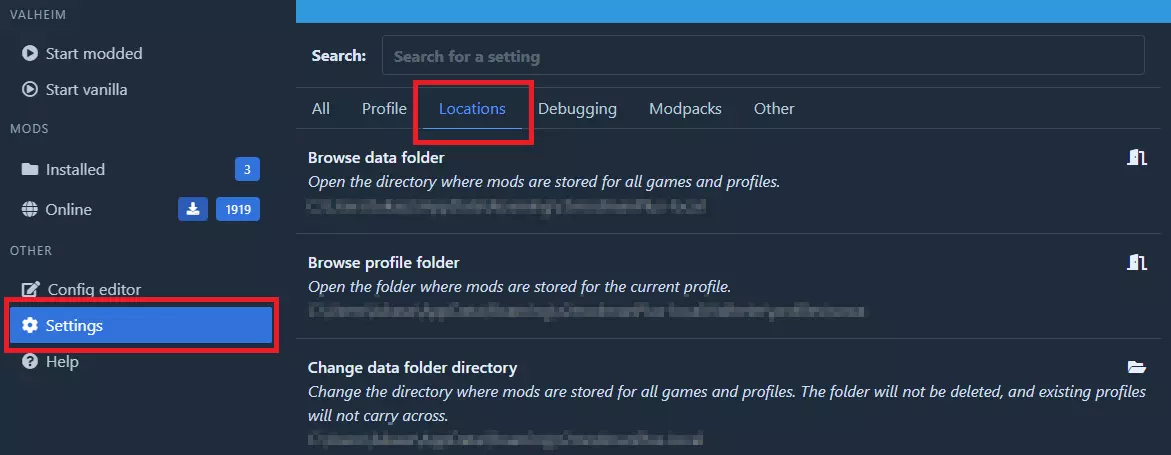
2. Launch r2modman application and locate previously installed mods – navigate Settings tab, then go to Locations tab.

3. Click on the Browse data folder.

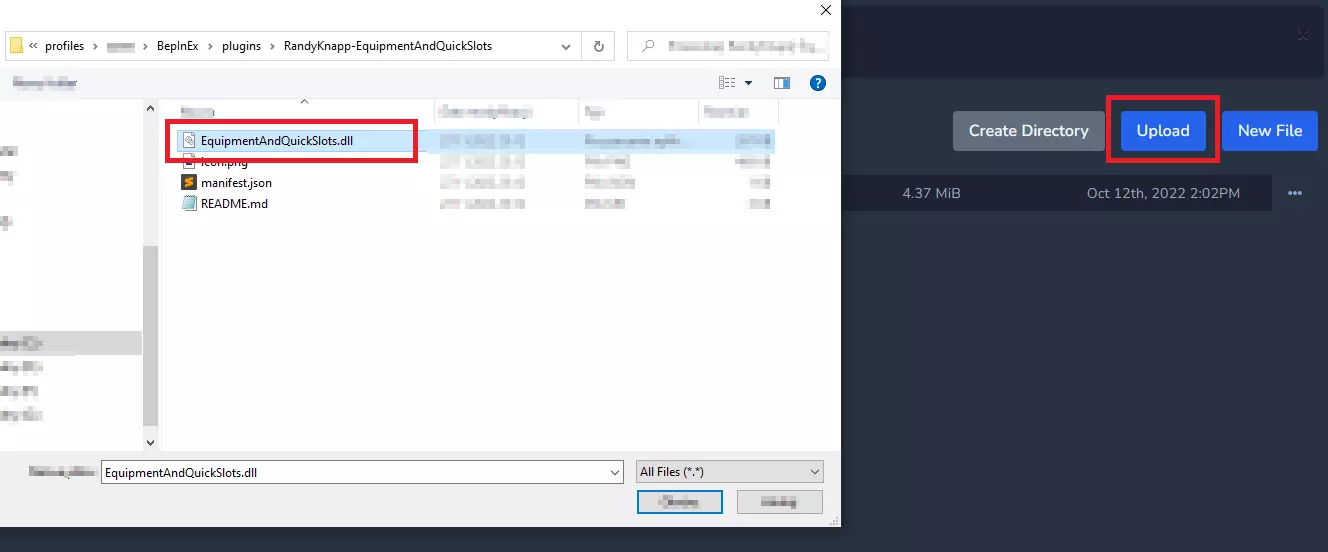
4. In the new window follow this path: Valheim > profiles > <your_profile_name> > BepInEx > plugins

5. Go to your server panel and enter “Files” tab. Follow this path:
/home/container/BepInEx/plugins6. In the “plugins” directory upload .dll file from previously opened folder.

7. Restart your server.
We hope that our intuitive web interface has allowed you to manage your Valheim server easily. If you want to ask us any questions, feel free to contact us via e-mail, ticket or live chat!
This tutorial will show you how to upload Valheim Plus plugins

