
Rust allows server owners to reset the server from time to time. It is possible to perform automatic cleanup of map data, blueprint data or both in scheduled interval.
There are 3 kinds of rust wipes:
Map Wipe – wipe performed on most servers which removes structures, houses and furniture from the map. Map Wipe usually occurs on Thursdays.
Blueprint Wipe – wipe performed on server when administrator wants to clean progress made on blueprints that have been unlocked by players and erase them.
Server Wipe – complete server wipe which erase everything and players must start game from beginning.
How to wipe Rust server
In this tutorial we will show two ways in which you can wipe your Rust server.
First way
1. Stop your server
Go to your server panel and navigate “Console” tab. Click on “Stop” button.
2. Navigate “rust” directory
Once you are in a server panel, go to “Files”. Follow this path: /home/container/server/rust to find directory you need.
3. Delete appropriate files depending on what type of wipe you want to perform
– when you want to wipe blueprints, you need to delete all files with .db extension
– when you want to wipe map, you need to delete all files with .sav and .map extension
– when you want to wipe serber, you need to delete all files with .db, .sav and .map extension
4. Start your server
Go to server panel and navigate “Console” tab. Select “Start” button to start your server.
Second way
WARNING: The steps described below are for full server wipe. At the end of this guide, you will know how to do map wipe or blueprint wipe.
1. Navigate “Schedules” tab
Go to your server panel and select “Schedules” tab.
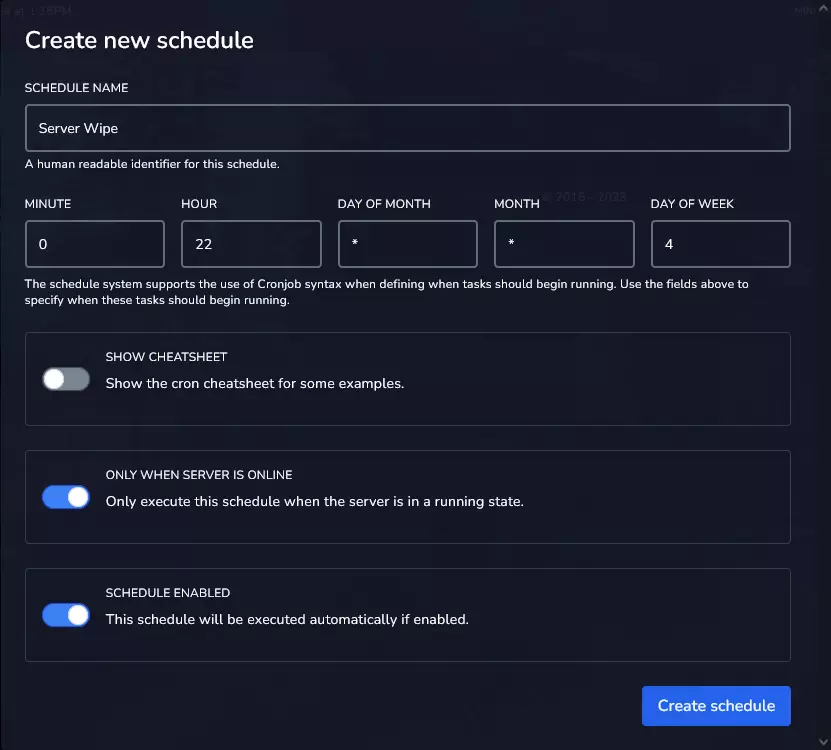
2. Create a new schedule
Once you are in a “Schedules” tab, you can create a new schedule by clicking on “Create schedule” button.
3. Complete the schedule details
Assign name for a new schedule and choose how often wipe will appear – server wipe on this example will appear every Thursday at 22:00 (our scheduler is based on Linux Cron, learn how to determine frequency here).
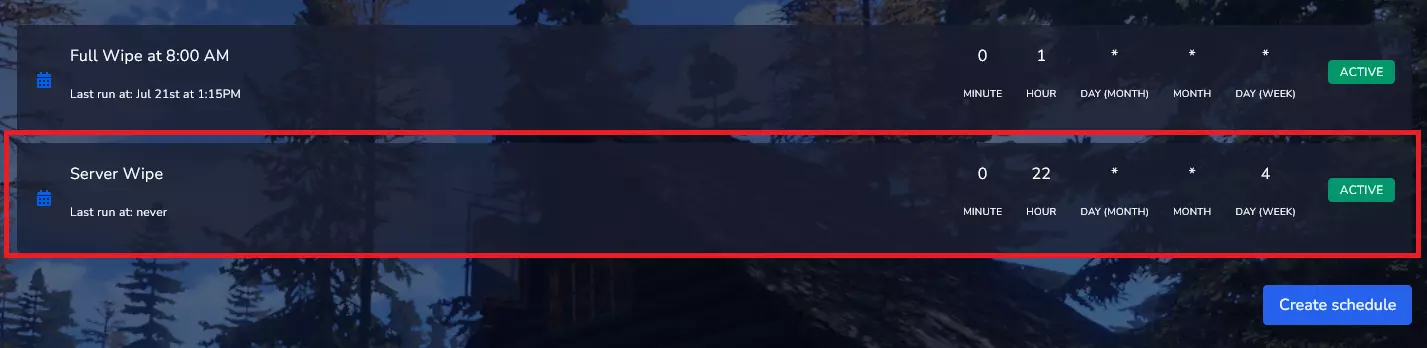
4. Edit new wipe
Once you have created a new schedule, you can create a new tasks inside. On the schedule list find appropriate schedule bar and click on it.
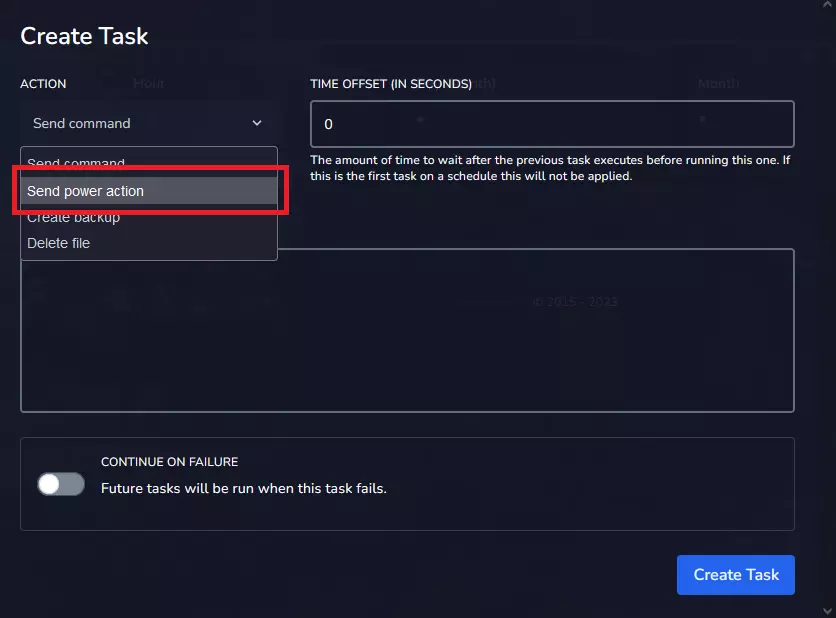
5. Create a new task
After clicking on your schedule bar you will see schedule details and will be able to create tasks. Click on “New Task” button to create a new task.

6. Select “Send power action” from “ACTION” dropdown
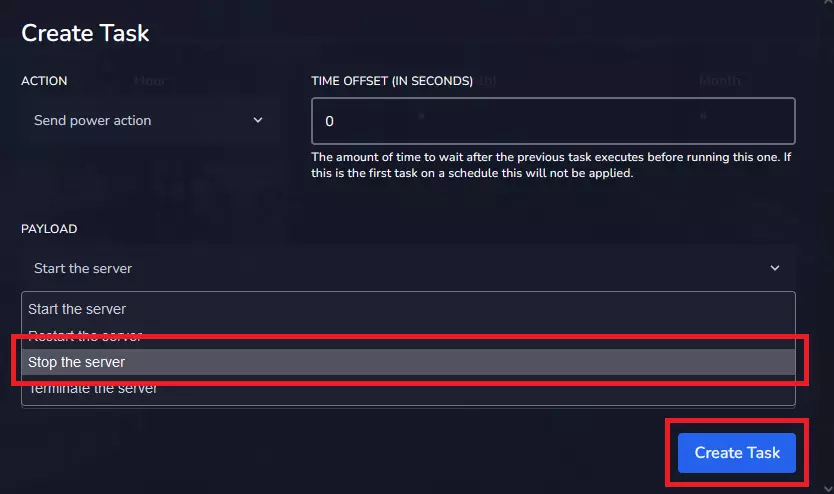
7. Select “Stop the server” from PAYLOAD dropdown, then select “Create Task”
8. You should see your first action here:

9. Create new task, select “Delete file” from ACTION dropdown
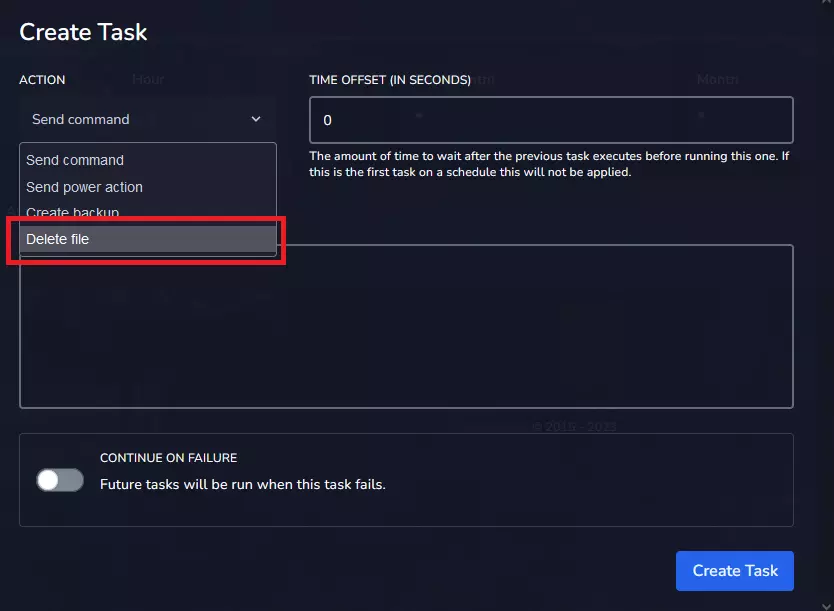
10. Set time offset
Setting time offset is necessary because file deletion must be done on a fully stopped server. In this example, file deletion will start after 30 seconds after previous action (server stop).
11. Type in following line into “REMOVE FILES” window:
server/rust/*.sav*12. Select “Create Task” button

13. Similarly to previous step, set time offset = 0 and type in following line:
server/rust/*.db*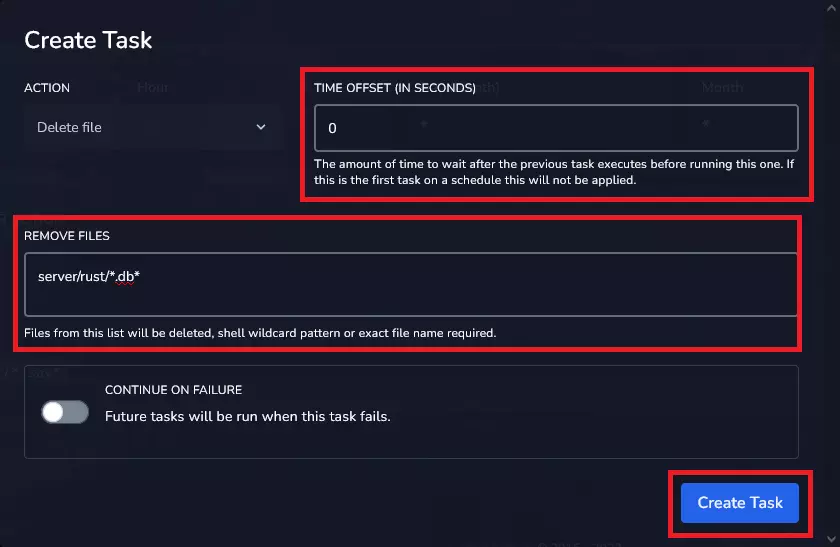
14. Repeat previous step and type in following line:
server/rust/*.map*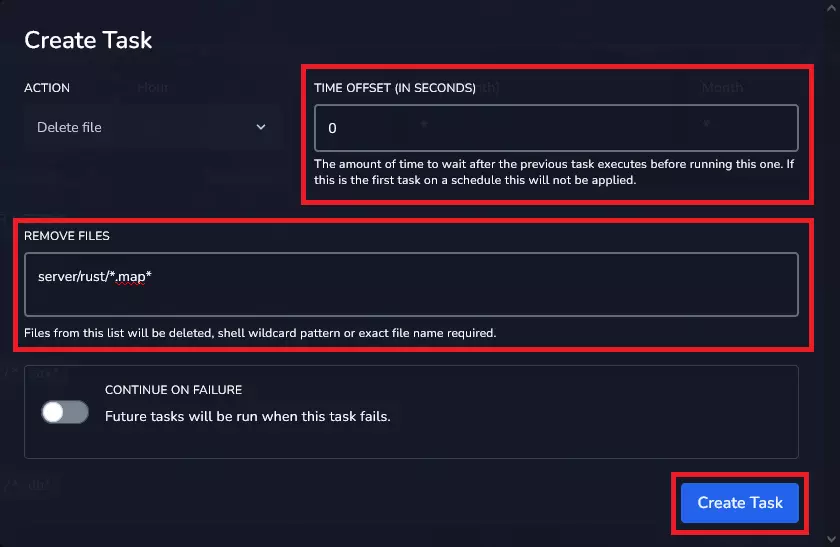
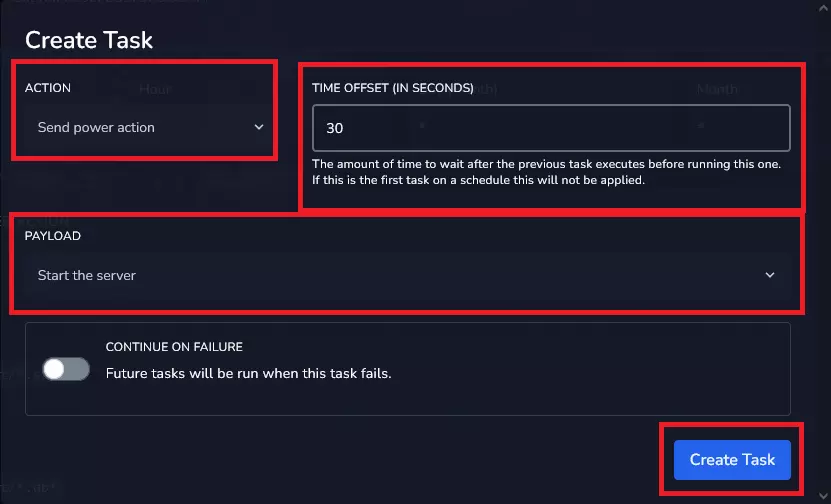
15. Create second “Send power action”
Set time offset, then select “Start the server” from “PAYLOAD” dropdown. Approve by “Create Task” button.
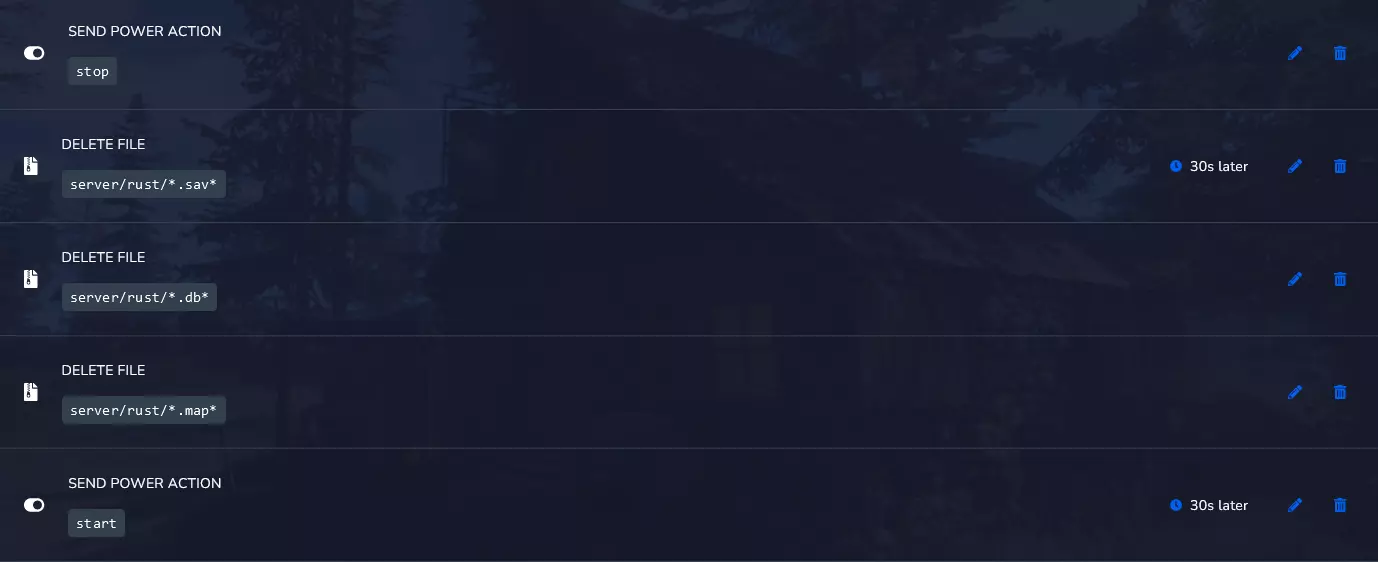
Here’s what your tasks should look like when you do a full server wipe (full map wipe required deletion of .sav .db .map files):
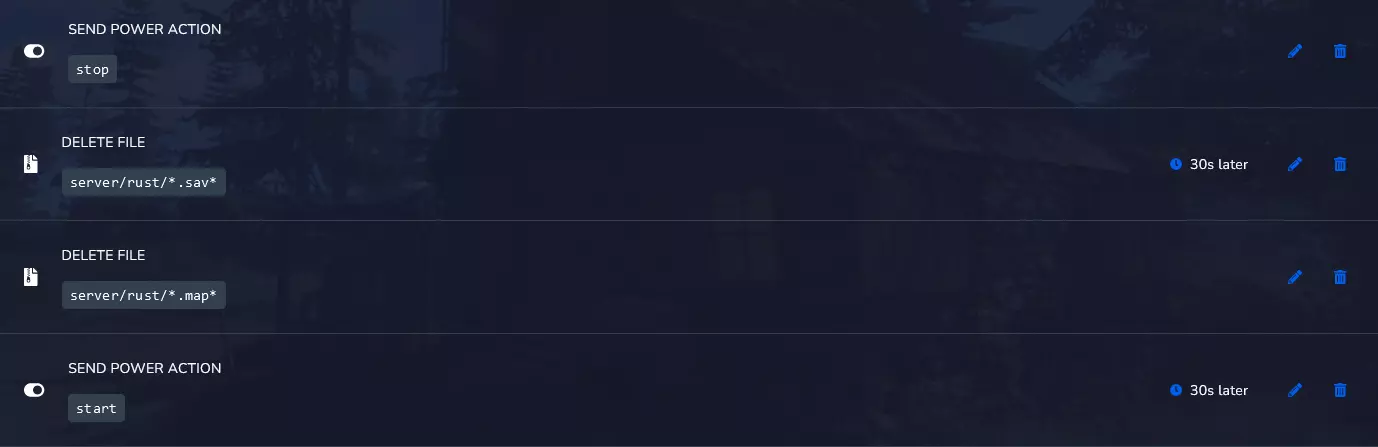
Here’s what your tasks should look like when you do a map wipe (full map wipe required deletion of .sav .map files):
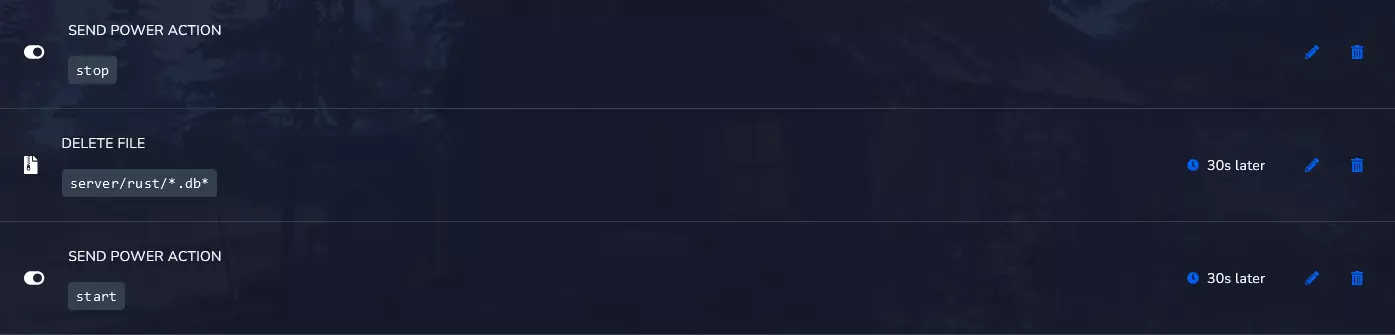
Here’s what your tasks should look like when you do a blueprint wipe(full map wipe required deletion of .db files):
We hope that our intuitive web interface has allowed you to manage your Rust server easily. If you want to ask us any questions, feel free to contact us via e-mail, ticket or live chat!
This tutorial will show you how to wipe server and setup automatic wipe on Rust server
