7 Days to Die is an incredibly immersive survival game where players must survive in a post-apocalyptic world filled with zombies. A key element of gameplay is preparing for the cyclical zombie horde attacks that occur every seven days. To do this, players must gather resources, build shelters, and develop their character’s skills.
This game is perfect for playing with friends on a dedicated server, so if you’ve already finished setting it up, you’re ready to join the action! In this article, you’ll learn how to directly connect to your 7 Days to Die server and how to find it on the server list.
In this article you will find:
- How to get hostname, IP and port from server panel
- How to direct connect 7 Days to Die server
- How to connect 7 Days to Die server via server browser
How to get hostname, IP and port from server panel
1. Login to server panel
Launch a control panel website in your favorite browser and login with your credentials.
2. Locate your server in panel
Follow to your server list in homepage or follow directly to “Servers” tab from sidebar. Select your 7 days to die server from server list. This should follow you to “Console” view, where you can find information about your server.
3. Get hostname from control Panel
Hostname of your server should be visible above the console of the server at “Console” view. It’s visible in same place as name and description of the server.

4. Get Server IP Address and Port from control panel
Locate “Address” panel in “Console” view. You found a hostname/IP address and port of your server.

How to direct connect 7 Days to Die server
Follow steps in this section to connect to your 7 Days to Die server using IP and port:
1. Launch the game
Begin by launching 7 Days to Die game on your computer. Ensure that your game is updated to the latest version or version that is supported by game client. Server and game version should be the same. Game version can be found in right upper corner of game window.
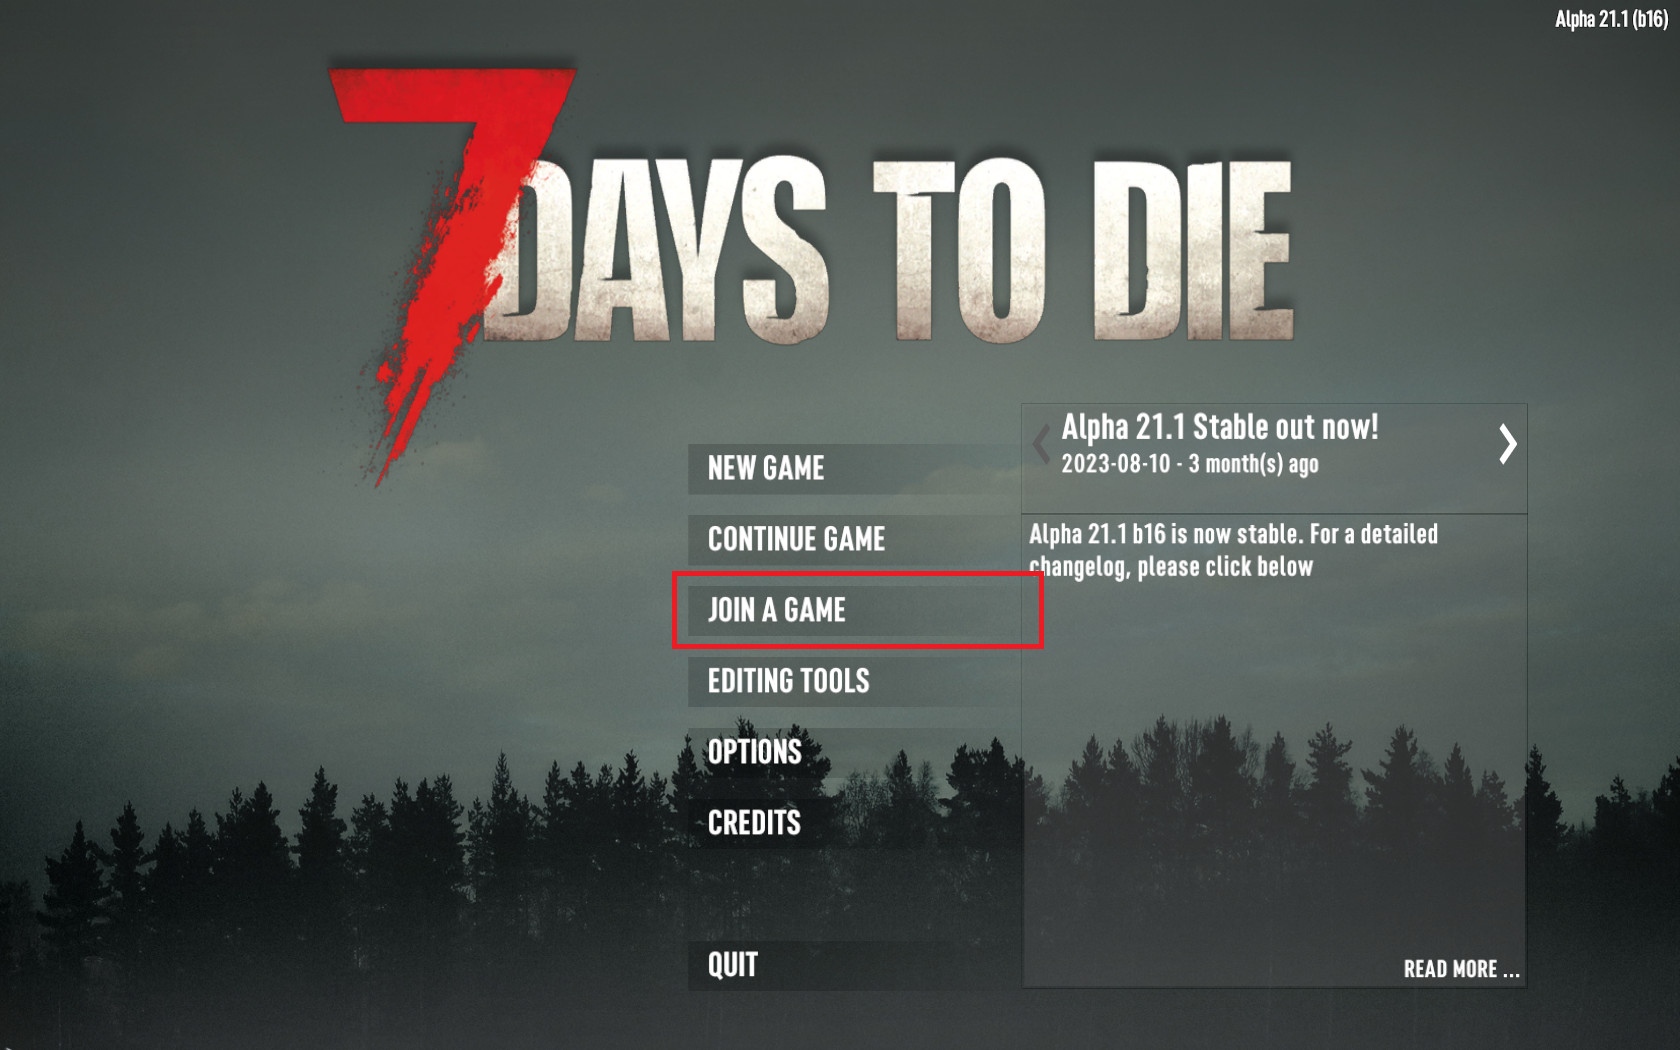
2. Select “JOIN A GAME” from main menu
Once you’re in the game, locate and click on the “Join a game” option. This is the way to connect to a multiplayer server.
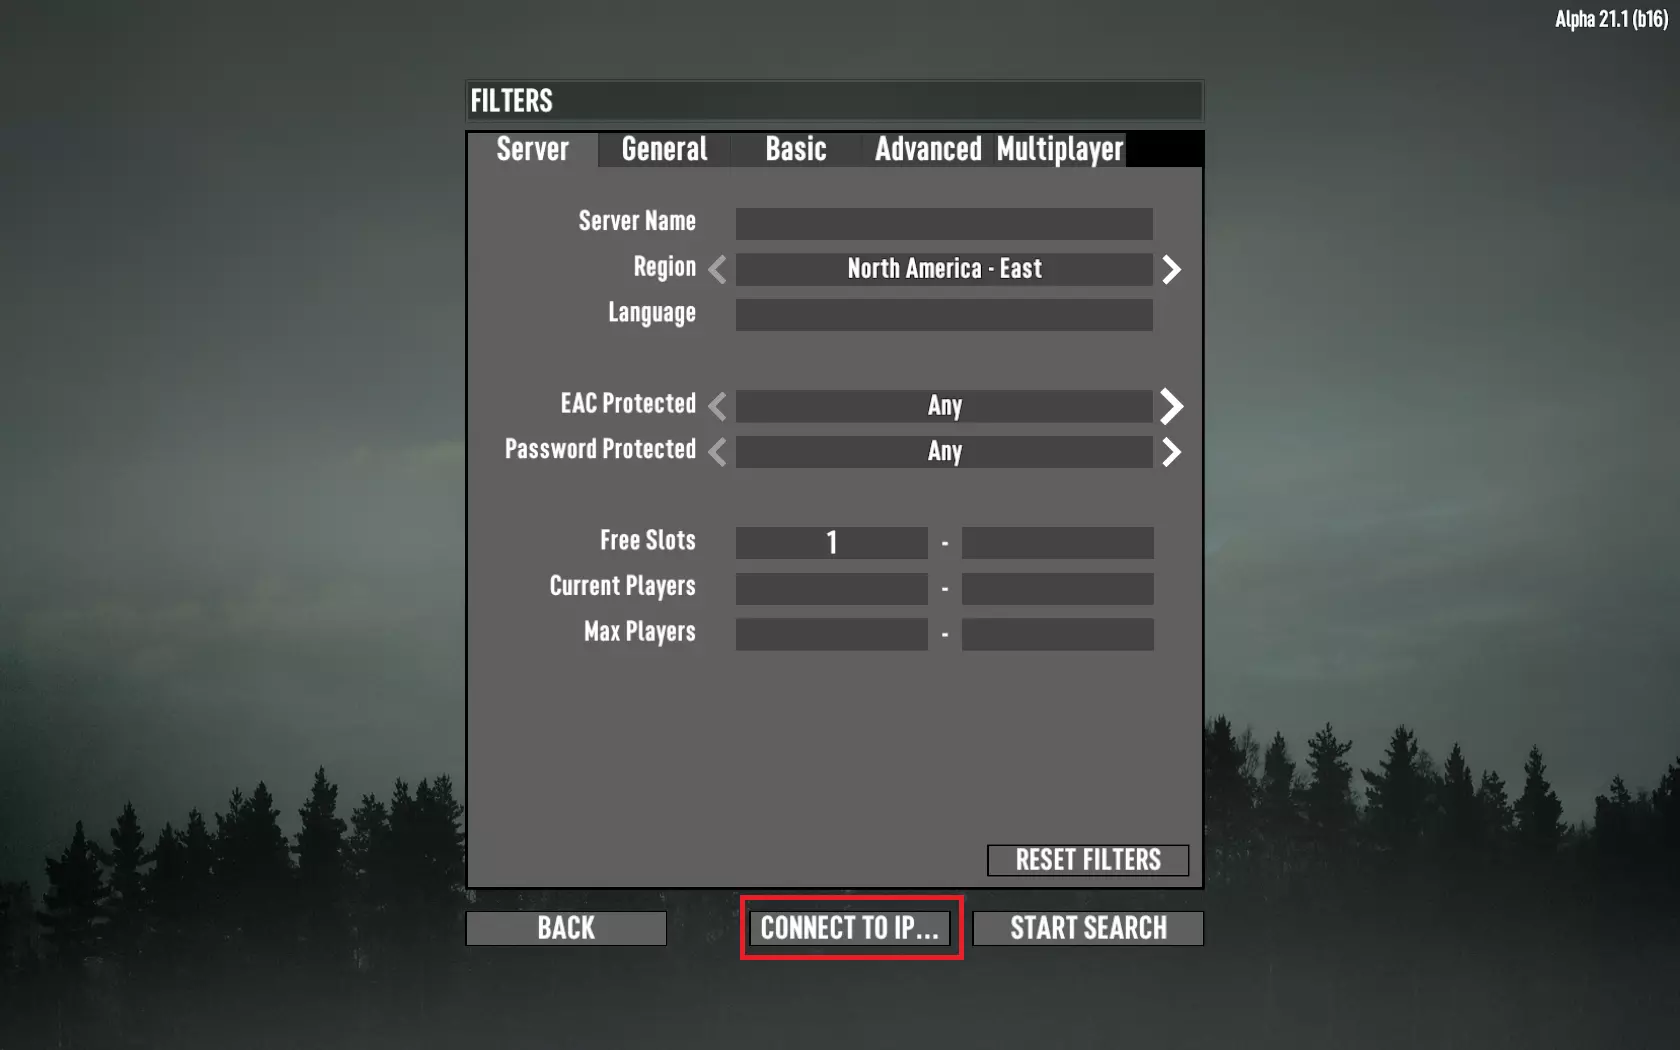
3. Select “Connect to IP…”
As the search commences, you don’t need to wait for a list of available servers will populate your screen. Go directly and click on “Connect to IP” to continue typing IP and Port.
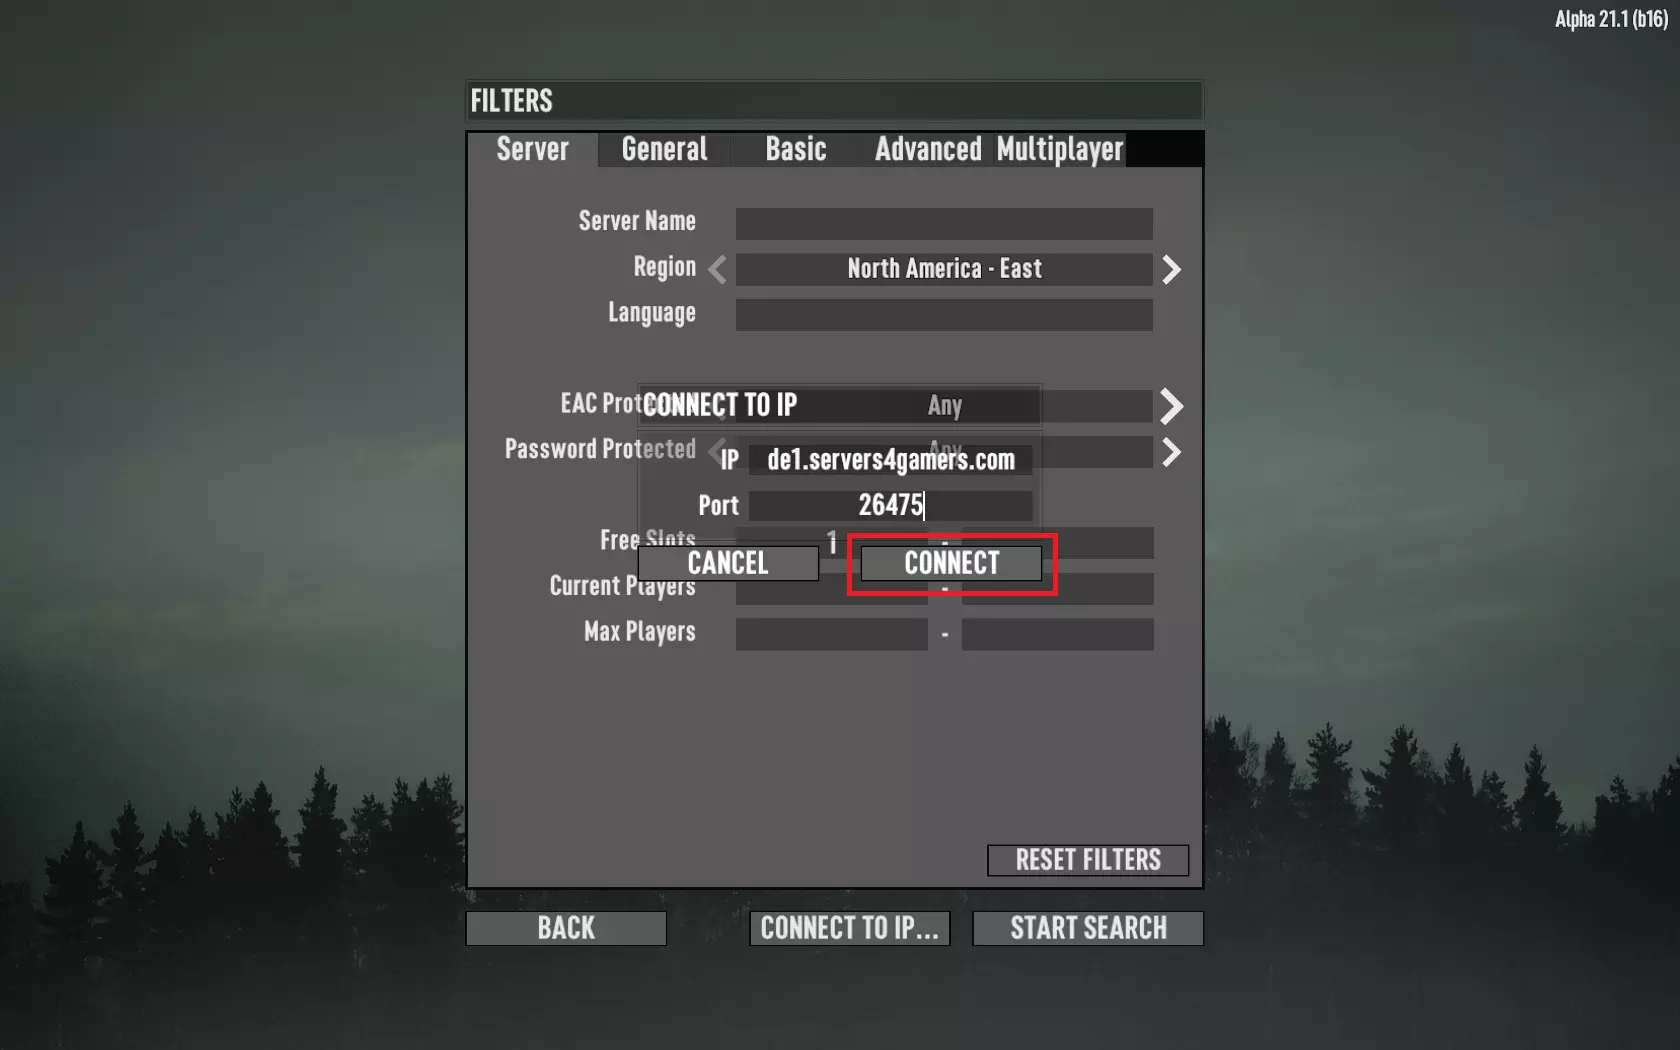
4. Enter IP and port
Upon clicking “Connect to IP,” a new window will appear, prompting you to input the server’s IP address and port number. You should found this information based on previous section of this tutorial. Enter the IP and port found in game panel into their respective fields. Approve your choice by clicking on “CONNECT” button.
How to connect 7 Days to Die server via server browser
1. Launch the game
Begin by launching 7 Days to Die game on your computer. Ensure that your game is updated to the latest version or version that is supported by game client. Server and game version should be the same. Game version can be found in right upper corner of game window.
2. Select “JOIN A GAME” from main menu
Once you’re in the game, locate and click on the “Join a game” option. This is the way to connect to a multiplayer server.
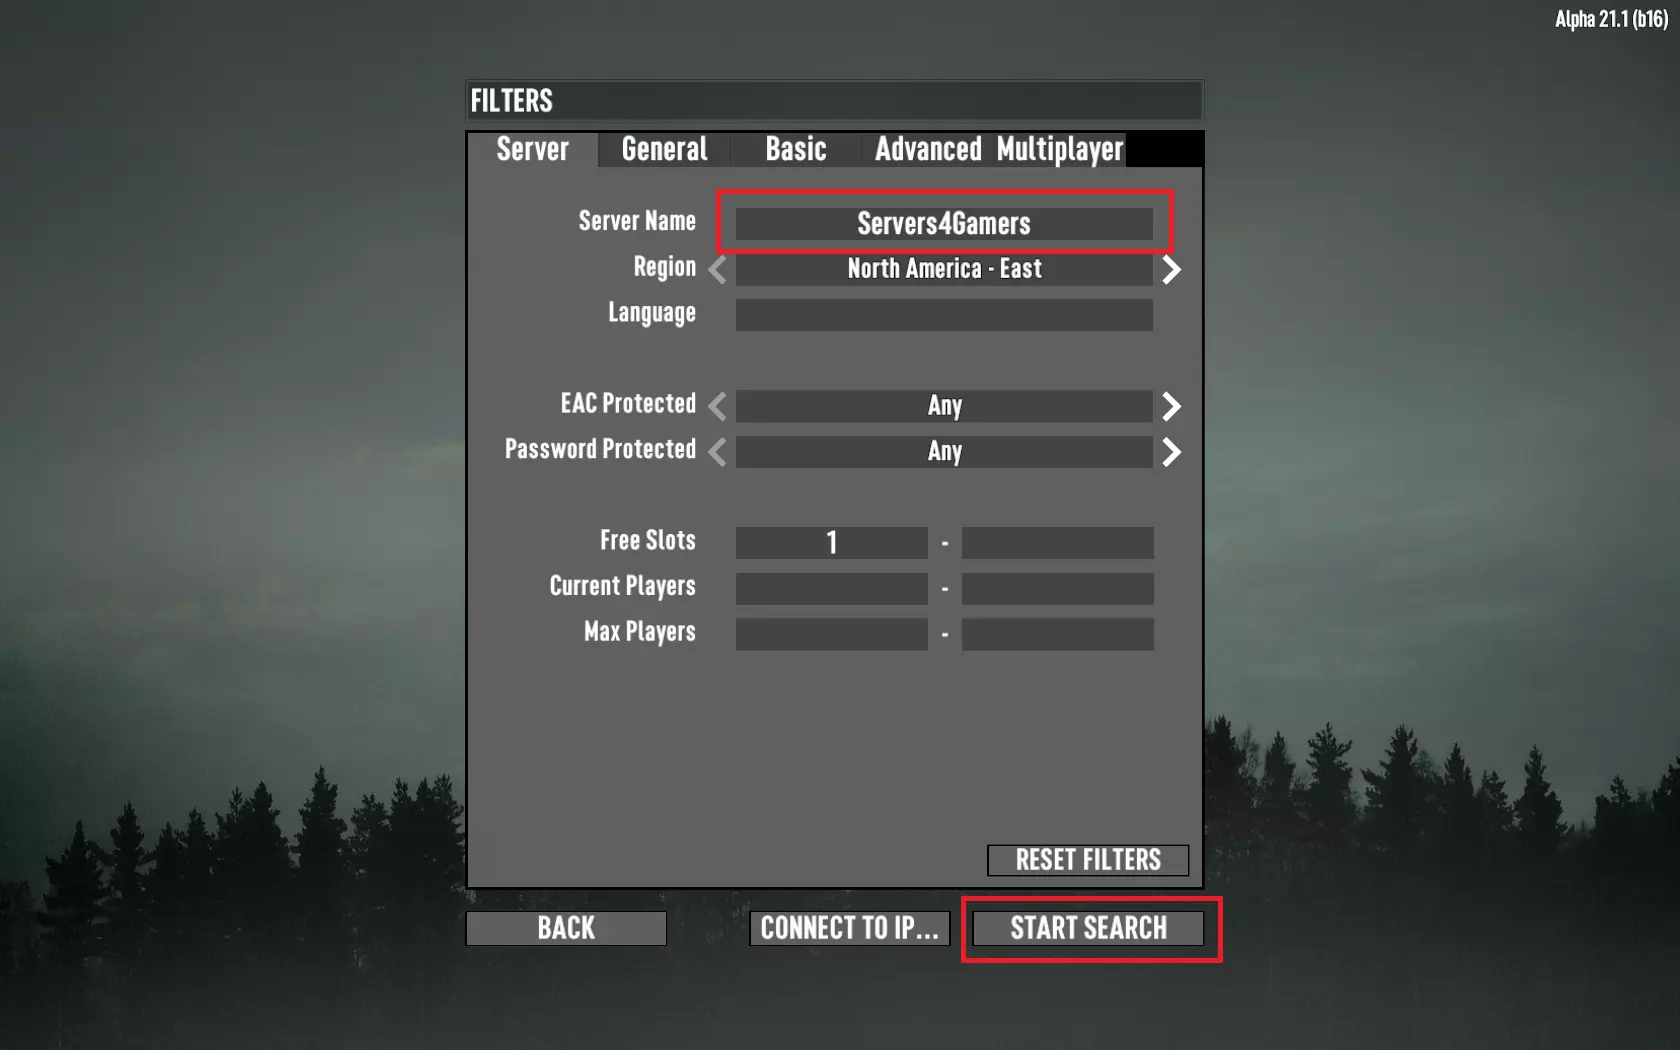
2. Enter Your hostname and search for the server
Within the “Join a Game” menu, you’ll be prompted to enter a hostname which you can define in game panel. Type hostname that you found in previous point of this tutorial. After entering your hostname, click on “START SEARCH”. The game will then search for available servers matching your criteria.
3. Locate and connect to your server
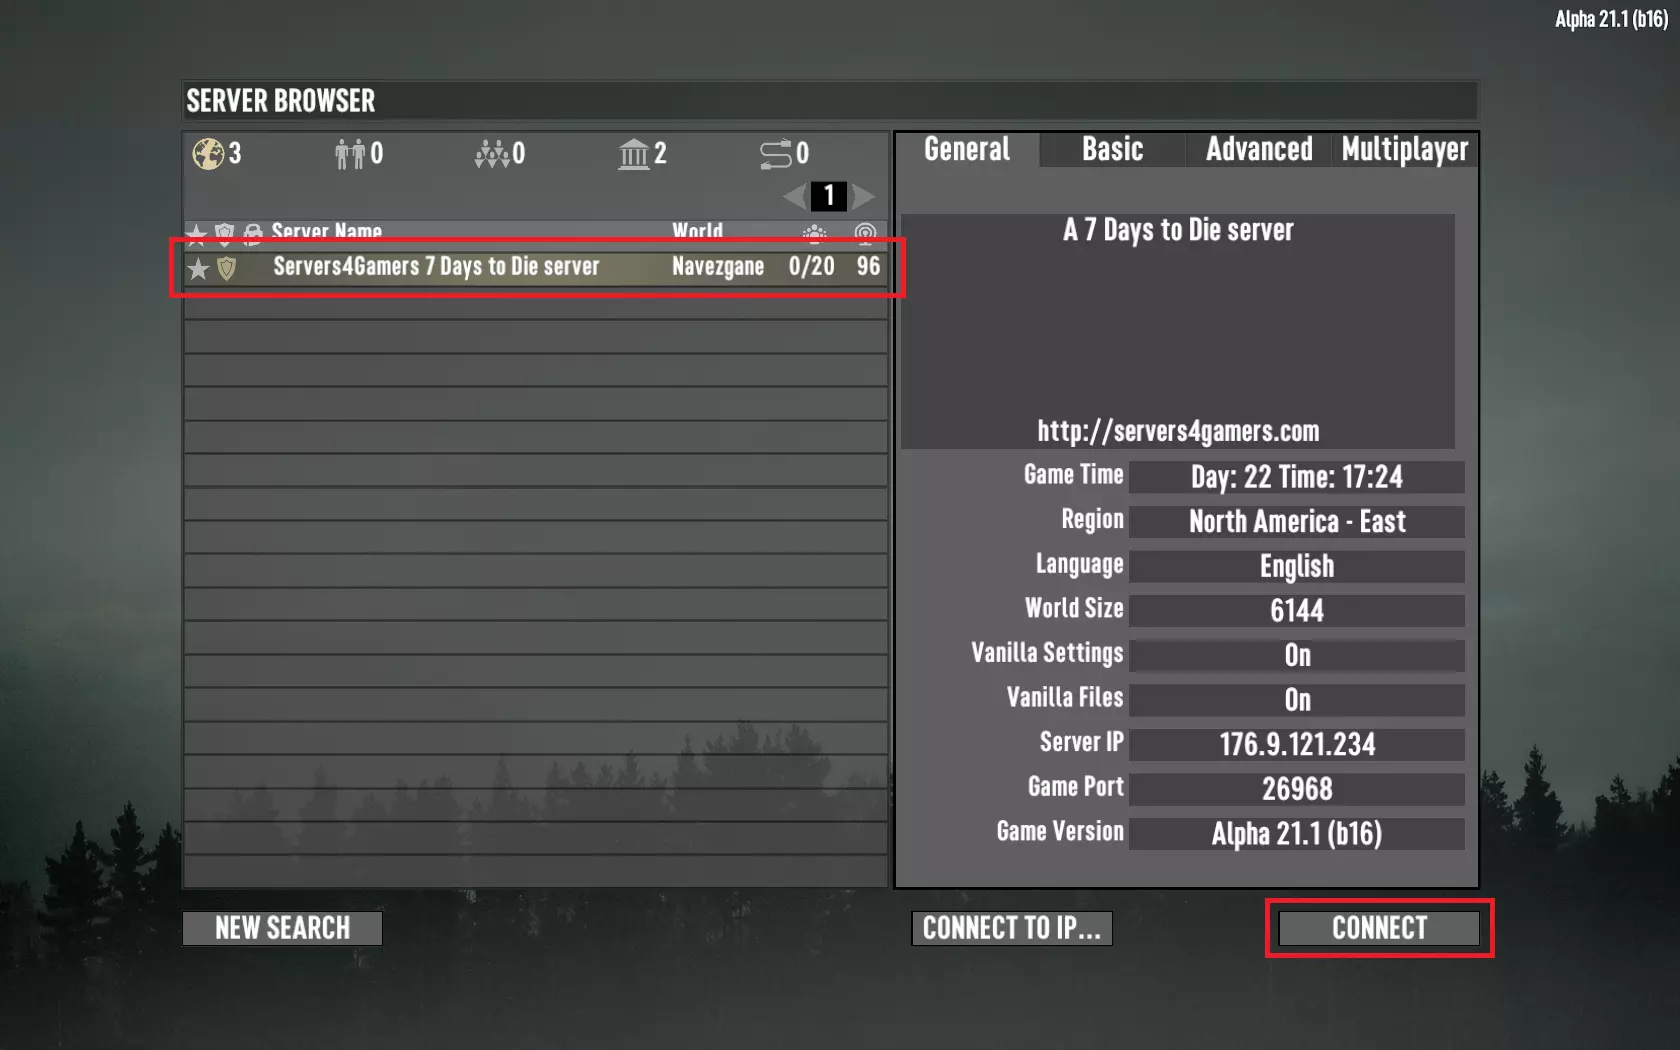
Once the search is complete, you’ll be presented with a list of available servers that meet your search criteria. Browse through the list to identify the specific server you want to join. Once you’ve found it, select the server from the list. Upon selecting your chosen server, you’ll see additional server details and options. Among these, you’ll find the “CONNECT” option. Click on it to initiate the connection process.
4. Enjoy the game
If you’ve followed these steps correctly and the server is online, you will successfully connect to the chosen 7 Days to Die game server. You will see a screen to load game resources and finally connect to your server.
Looking for answers to other questions? In our guides you will learn:
How to configure a 7 Days to Die server
How to reset your world in 7 Days to Die Server
How to change difficulty of a 7 Days to Die server
How to install mods on a 7 Days to Die server
We hope that our intuitive web interface has allowed you to manage your 7 Days to Die server easily. If you want to ask us any questions, feel free to contact us via e-mail, ticket or live chat!
This tutorial will show you how to connect 7 Days to Die server

