


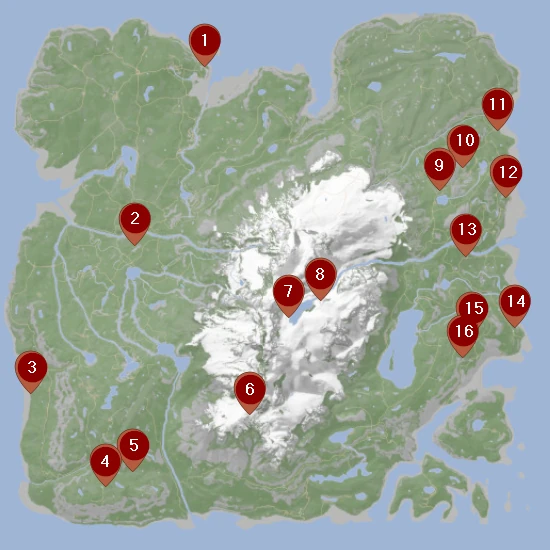
Check where you can find Sons of the Forest blueprints
The full version of Sons of the Forest introduced a number of new plans that will expand your crafting possibilities. In this article you will find out what new products are waiting for you and where to find them.
Powered Cross
How to find the Powered Cross blueprint (place marked on the map with number 1):
- Enter the cave marked with number 1 on the map.
- While going through the cave, you will reach the first fork where you should turn right.
- At the second fork, turn left.
- Go to the alcove at the top of which you will find hanging crosses. Go through it until you reach another fork and turn left.
- Before moving on, search the skeletons – under them you should find the blueprint you are looking for.

| Powered Cross Recipe | 1x Log 2x Wire 9x Light Bulb |
Glider Launcher
How to find the Glider Launcher blueprint (place number 2 on the map):
- Go to the orange marker located in the western part of the map.
- Enter the small cave and continue down the corridor. The diagram is located next to two skeletons.

| Glider Launcher Recipe | 4x Wire 4x Turtle Shell 14x Stick 14x Log |
Solafite Generator
How to find the Solafite Generator blueprint (place marked on the map with number 3):
- Go to the west-central part of the map. Head south along the beach.
- Heading south, you should notice a metal fence with an entrance behind it.
- Keep going, unlocking wooden obstacles along the way. At the end of the cave there is a Solafite Generator blueprint.
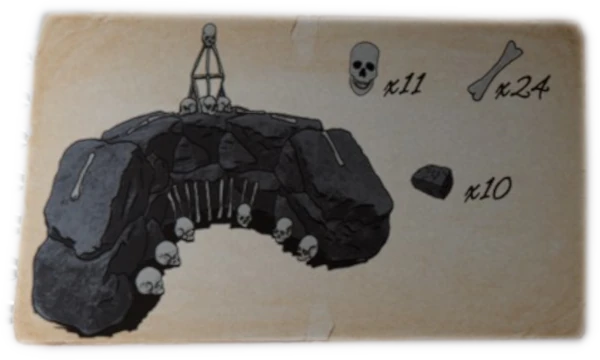
| Solafite Generator Recipe | 11x Skull 24x Bone 10x Stone |
Teleporter
How to find the Teleporter blueprint (place marked on the map with number 4):
- Go to the southwestern part of the map.
- You should find an abandoned camp with an entrance to a cave inside.
- Go down and take the right path. Next to the skeleton you will see the Teleporter blueprint.

| Teleporter Recipe | 8x Skull 50x Bone 33x Stone |
Multi Trap
How to find the Multi Trap blueprint (place marked on the map with number 5):
- Go to the southwestern part of the island.
- Between the orange and blue markers you will find a rock formation with a cave entrance.
- Enter the cave and slide down the rope.
- Go through the middle door. There should be a table in front of you with the Multi Trap blueprint on it.
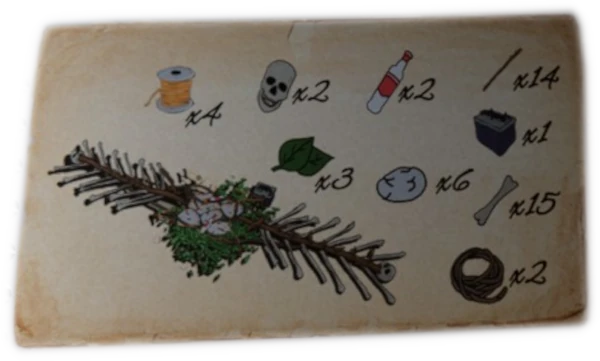
| Multi Trap Recipe | 4x Wire 2x Skull 2x Vodka Bottle 14x Stick 3x Leaf 6x Rock 1x Golf Cart Battery 15x Bone 2x Rope |
Spear Thrower
How to find the Spear Thrower blueprint (place marked as number 6 on the map):
- Go to the southern part of the snowy mountains.
- Enter the ice cave. At the end you will find the Spear Thrower blueprint.
| Spear Thrower Recipe | 3x Wire 2x Log 2x Stick 3x C4 Brick 1x Golf Cart Battery |
Gore Couch
How to find the Gore Couch blueprint (place number 7 on the map):
- Go towards the mountains in the center of the map.
- You should see a lake. Go to the west side of the lake.
- Find an abandoned cottage characterized by a cross hanging by the door.
- Enter the abandoned cottage and search the floor, where there should be a skeleton holding the Gore Couch blueprint in his hands.

| Gore Couch Recipe | 40x Stick 2x Leg 14x Creepy Armor 4x Arm |
Clock
How to find the Clock blueprint (place marked on the map with number 8):
- Go to the middle of the snowy mountains. The place you are looking for is on the eastern side of the lake, right next to the mouth of the stream.
- Enter the ice cave, at the end of which you will find a barely visible entrance to the cave (next to the skeleton with a note).
- Slide down on the ropes. Next to the skeleton is the Clock diagram.
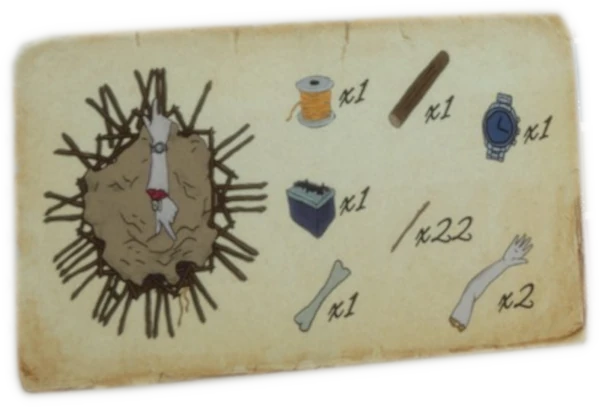
| Clock Recipe | 1x Wire 1x Log 1x Watch 1x Golf Cart Battery 22x Stick 1x Bone 2x Arm |
Item Plating
How to find the Item Plating blueprint (place marked on the map with number 9):
- Go to the northeastern part of the map. Between the sea and the mountain slopes, find a lake and go to its northern end.
- Between the rocks, find a hole in the ground which is the entrance to the cave.
- Enter the cave and walk between the rocks until you reach the water. Swim through the underwater part of the route.
- After leaving the water, turn left and destroy the wooden obstacles.
- Go straight until you reach a skeleton with a blueprint next to it.
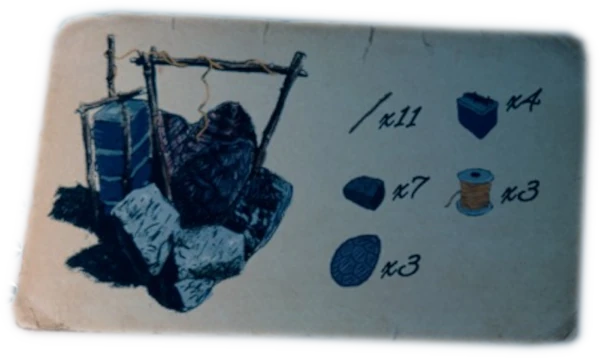
| Item Plating Recipe | 11x Stick 4x Golf Cart Battery 7x Stone 3x Wire 3x Turtle Shell |
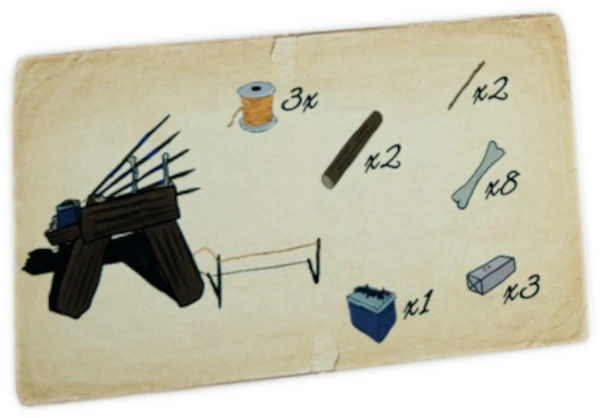
Spin Trap
How to find the Spin Trap blueprint (place marked on the map with number 10):
- Go to the north-eastern part of the island.
- Find an abandoned shack and go inside. There should be a Spin Trap blueprint on the table.
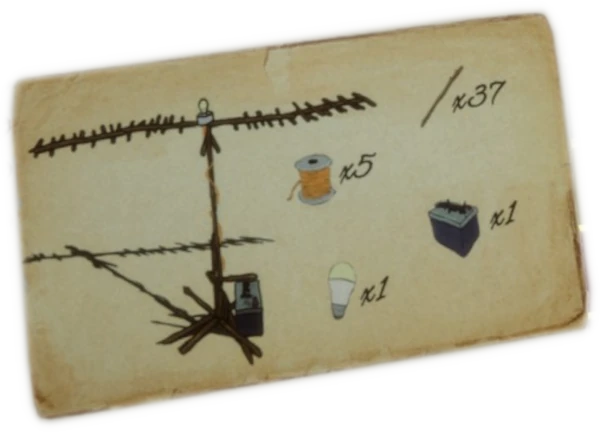
| Spin Trap Recipe | 37x Stick 5x Wire 1x Light Bulb 1x Golf Cart Battery |
Grind Trap
How to find the Grind Trap blueprint (place marked on the map with number 11):
- Go to the north-eastern part of the island.
- Near the beach you will find an abandoned hut with a blocked entrance.
- Destroy the blockade on the door and turn left – you should see a built-in entrance to the cave.
- Destroy the blockade and enter the cave.
- Go straight and you will come across skeletons and another blocked entrance with a rope behind it. Climb down the rope.
- Go along the cave, destroying the next blockades and rappel down again.
- Behind the waterfall you will find the Grind Trap blueprint.
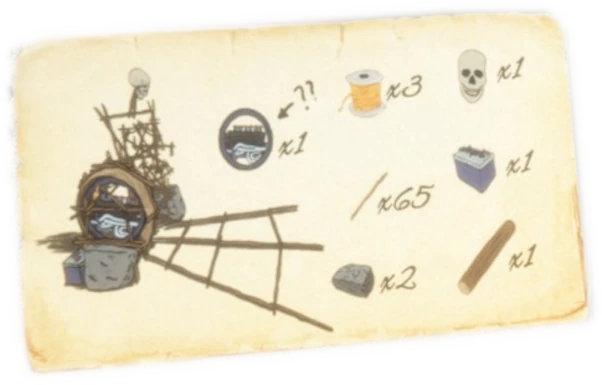
| Grind Trap Recipe | 3x Wire 1x Skull 65x Stick 1x Golf Cart Battery 2x Stone 1x Log 1x Knight V |
Armor Upgrade
How to find the Armor Upgrade blueprint (place marked on the map with number 12):
- Go to the northern end of the snowy mountains. From here, keep heading east until you reach the beach.
- To the west of the beach you should notice a bunker built into the rock formations.
- When you get through the entire bunker and approach the entrance to the Hell Cave, you will see a skeleton holding a blueprint.

| Armor Upgrade Recipe | 4x Wire 4x Gold Cart Battery 1x Skull 33x Bone 25x Stone |
Leg Lamp
How to find the Leg Lamp blueprint (place marked on the map with number 13):
- Go to the central-eastern part of the map. The place of which is located near the mouth of the river.
- Find the soldier who is waving a red flare at you.
- Go to the nearby hut. Destroy the floor to gain access to the cave entrance.
- Once inside, you will find yourself in a room. There should be a Leg Lamp blueprint on the table.
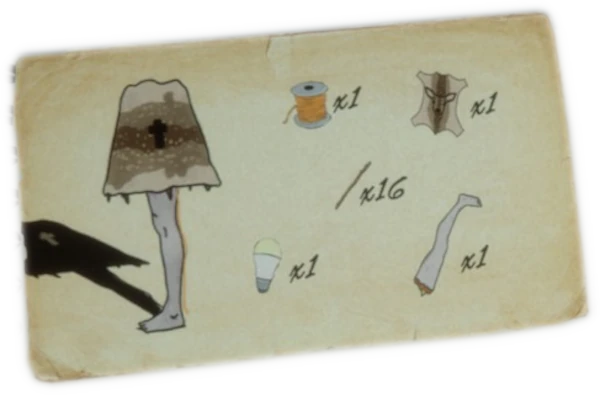
| Leg Lamp Recipe | 1x Wire 1x Animal Hide 16x Stick 1x Light Bulb 1x Leg |
Gore Chair
How to find the Gore Chair blueprint (place number 14 on the map):
- Go to the central-eastern part of the map.
- Walking along the beach, start heading towards the slope where you will find an abandoned village marked with number 14 on the map.
- Enter the hut with two chairs next to it.
- Search the hut thoroughly – there should be a Gore Chair blueprint on its floor.
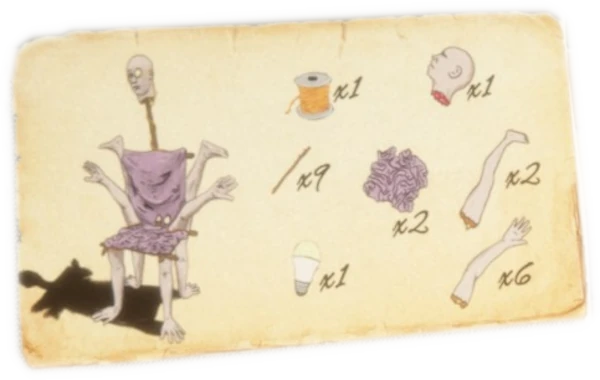
| Gore Chair Recipe | 1x Wire 1x Head 9x Stick 2x Creepy Armor 2x Leg 1x Light Bulb 6x Arm |
Bone Tower Repeller
How to find the Bone Tower Repeller blueprint (location marked on the map with number 15):
- Go to the central-eastern part of the map. The place you are looking for is east of the large lake.
- You should see a rock formation with a barricaded entrance. Destroy the barricade and go inside.
- Continue along the corridor until you notice a barrel – on it there should be the blueprint you are looking for.
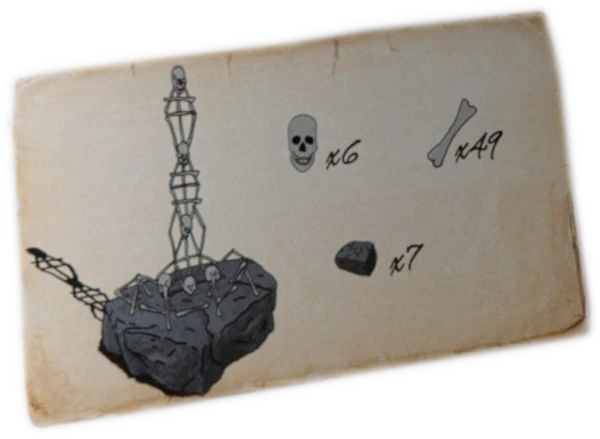
| Bone Tower Repeller | 6x Skull 49x Bone 7x Stone |
Spotlight
How to find the Spotlight blueprint (place number 16 on the map):
- Go to the central-eastern part of the map. The place you are looking for is east of the middle part of the large lake.
- In the distance you should see a soldier waving a red flare. Right next to it is the entrance to the cave.
- Enter the cave and slide down. Destroy the barricades on the doors – behind one of them you will find a tunnel leading further.
- Slide down the rope again.
- Find the Spotlight blueprint located on the box.

| Spotlight Recipe |
|
