


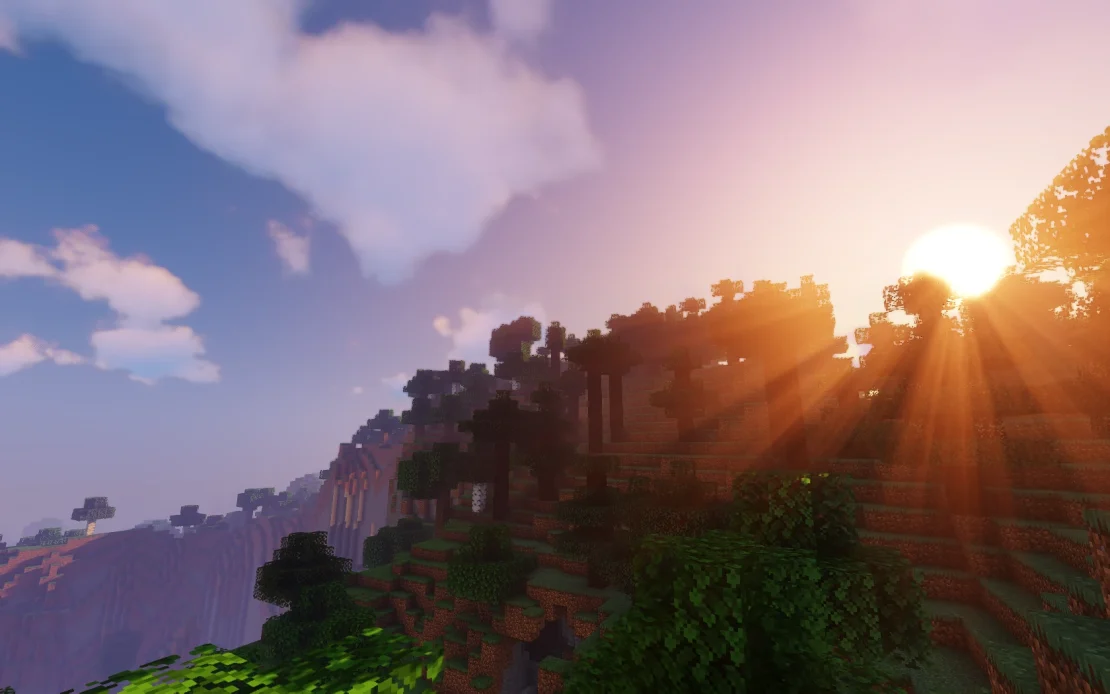
Shaders are one of the most popular ways to improve the graphics in Minecraft. With them, the game can gain realistic lighting, dynamic shadows, and a much more atmospheric look. In this guide, we will explain how to enable shaders using the CurseForge application.
How to Install Shaders in Minecraft using CurseForge
Installing shaders in your CurseForge launcher will require creating an instance with Iris Shaders and Sodium. The following steps will guide you through the entire process, step by step.
Create Instance with Iris Shaders
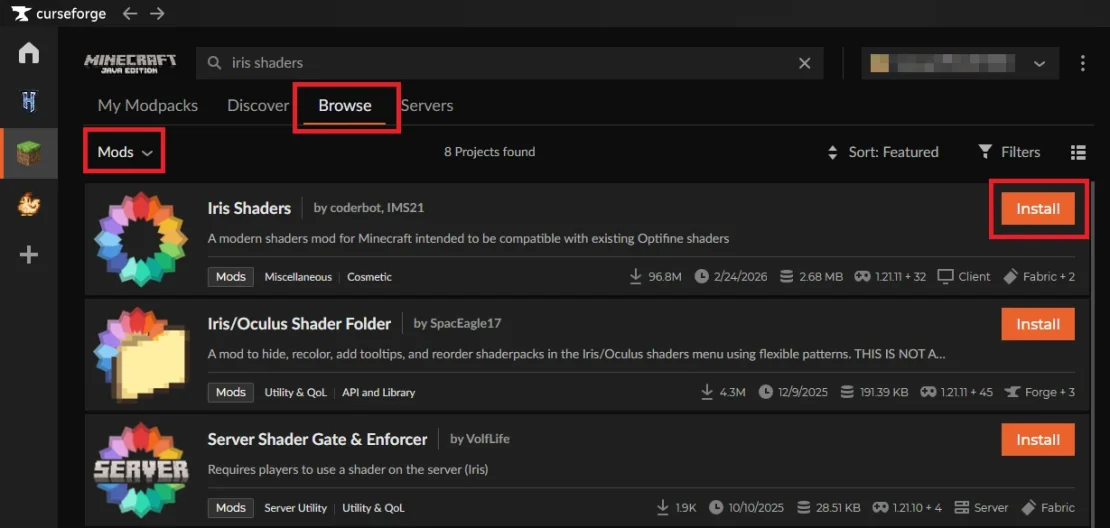
1. Launch the CurseForge application and go to the Browse tab.
2. Change the search category to Mods and type Iris Shaders into the search bar. Once you find the mod, click Install.
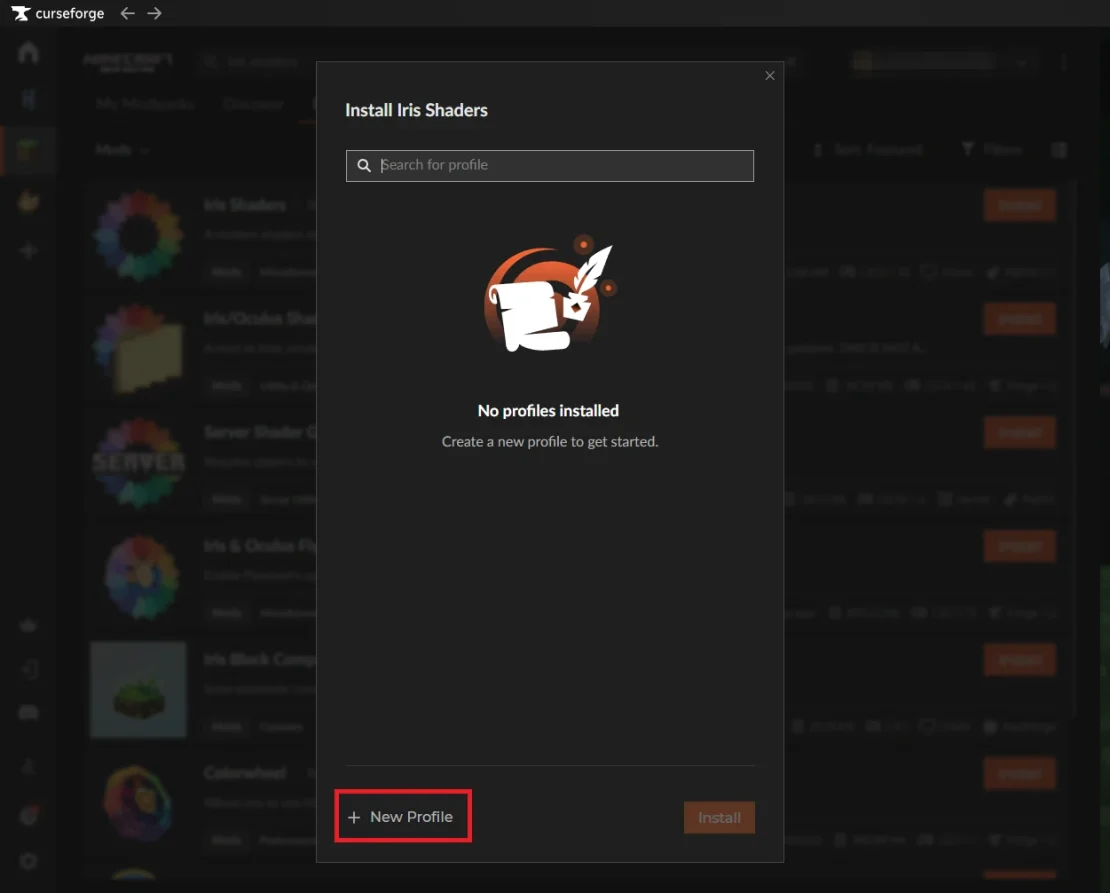
3. A new window will appear where you can choose existing instances or create a new one. Select the New Profile option.
4. Enter a name for your new instance, then choose your preferred Minecraft version, loader, and loader version.
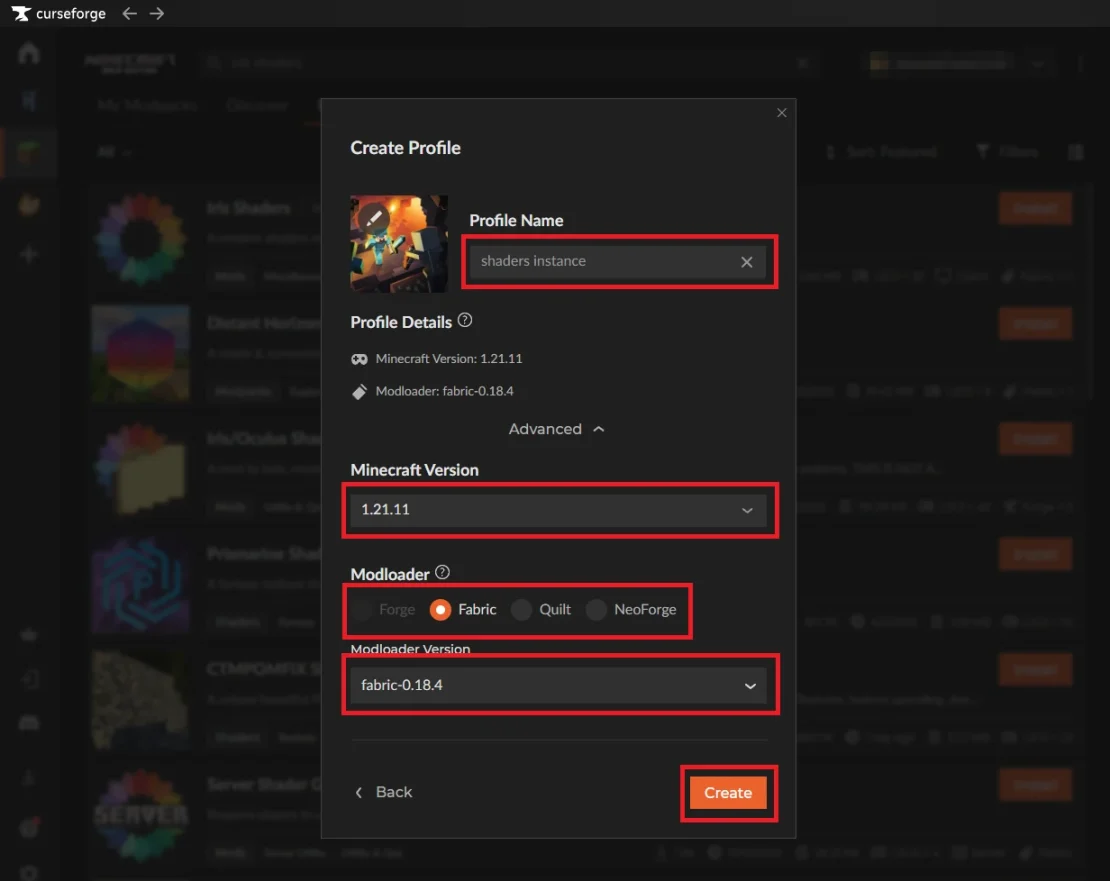
5. Select Create to finish creating the instance.
Add Shader to Instance
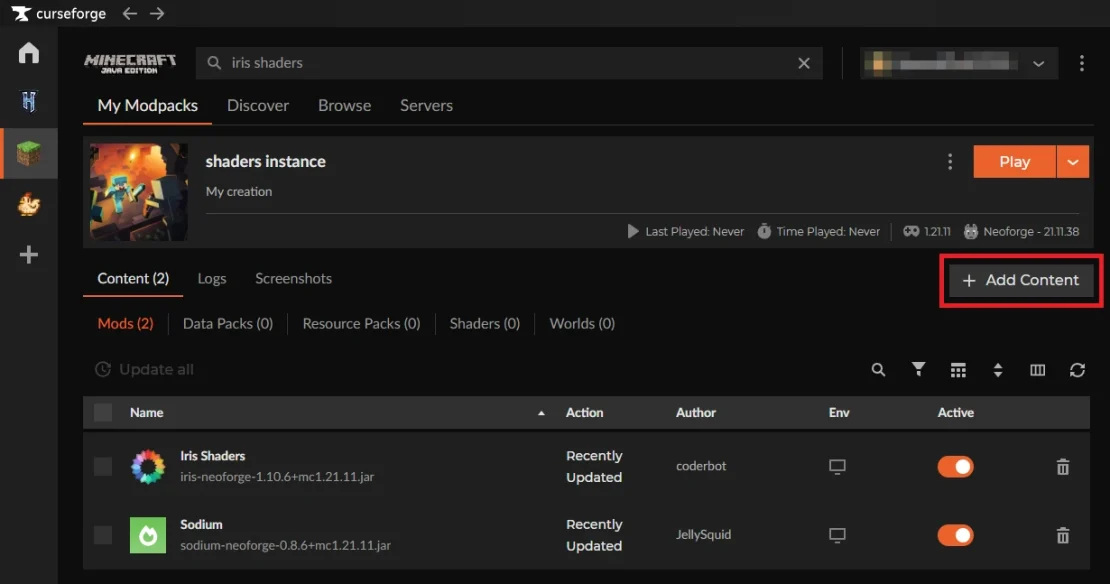
At this point you should have an active instance with Iris Shaders and Sodium installed. Here is what you should do to add shaders to it:
1. Select Add Content.
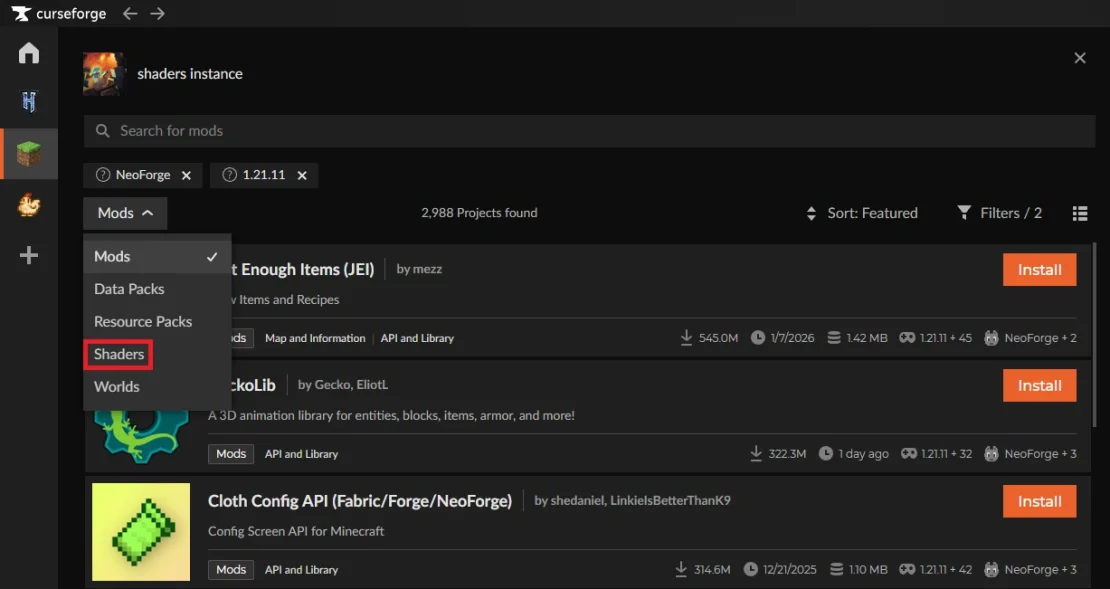
2. Change the search category to Shaders and find the shader you want to add.
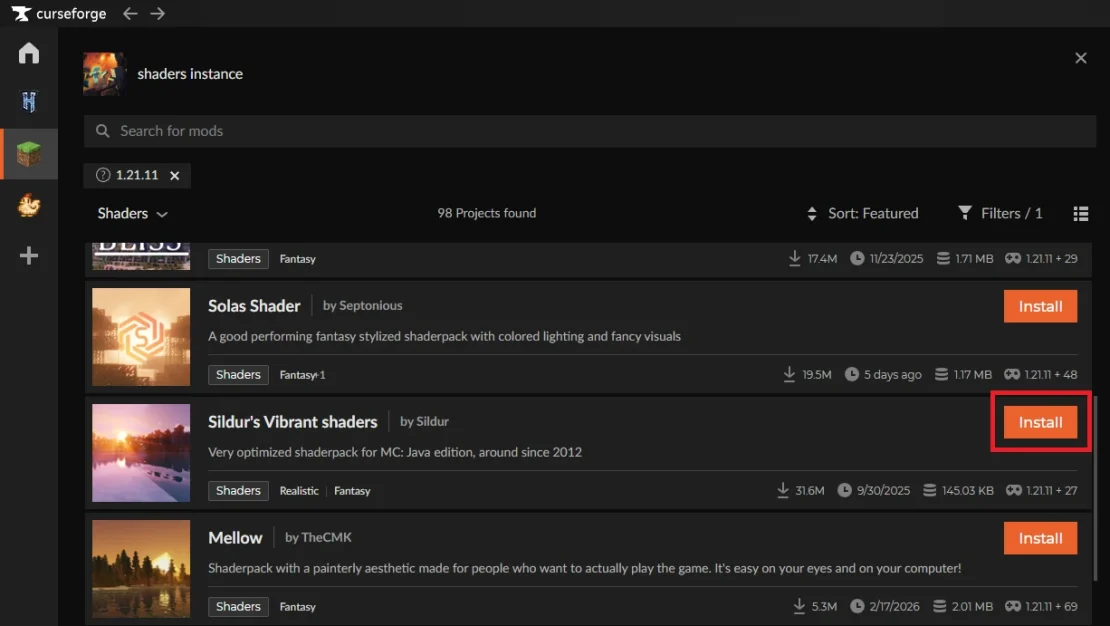
3. Click Install.
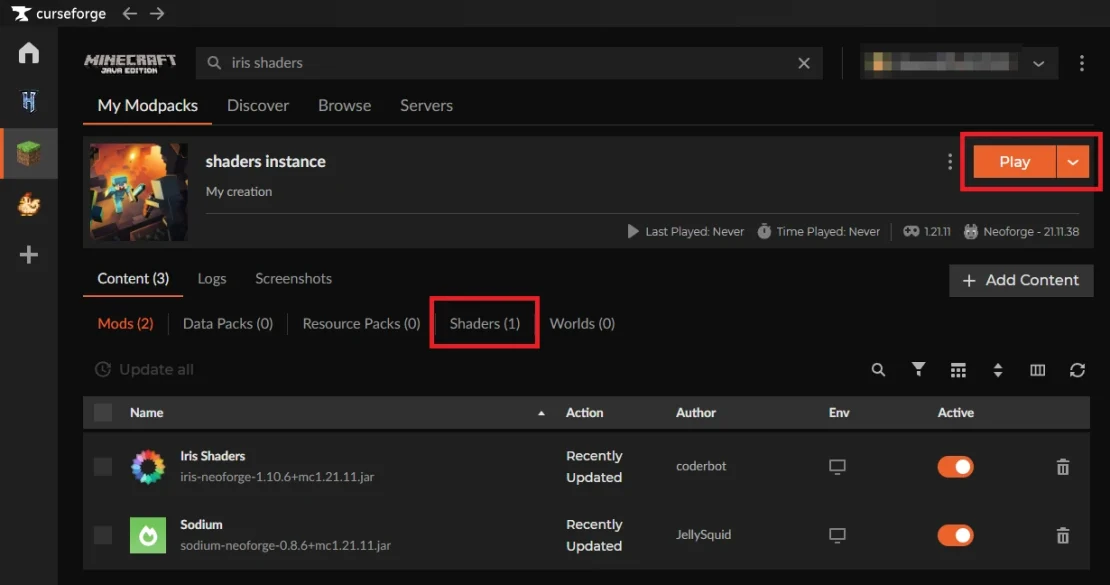
After installing the shader, return to the My Modpacks tab. This is where you will see your instance with the installed shader. Simply click Play to start the game.
How to Enable Shaders in Minecraft
Your shader is already installed, but it is not enabled yet. Here is what you need to do to enable the shader in the game:
1. Launch Minecraft and load into your world.
2. Press ESC and select Options.
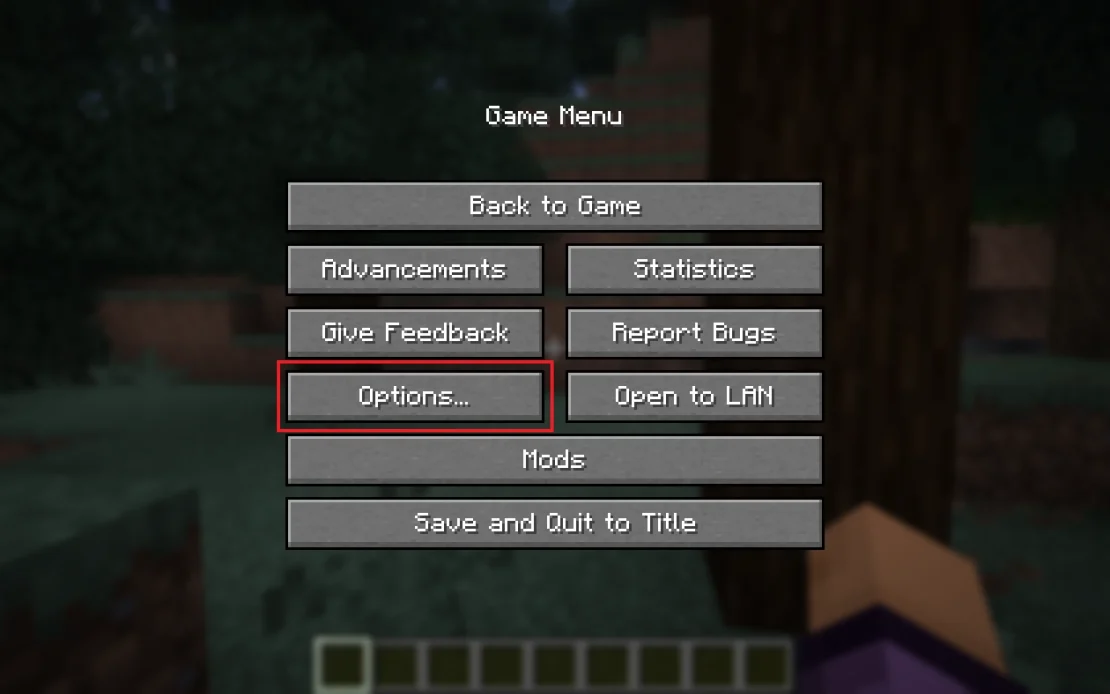
3. Click Video Settings.
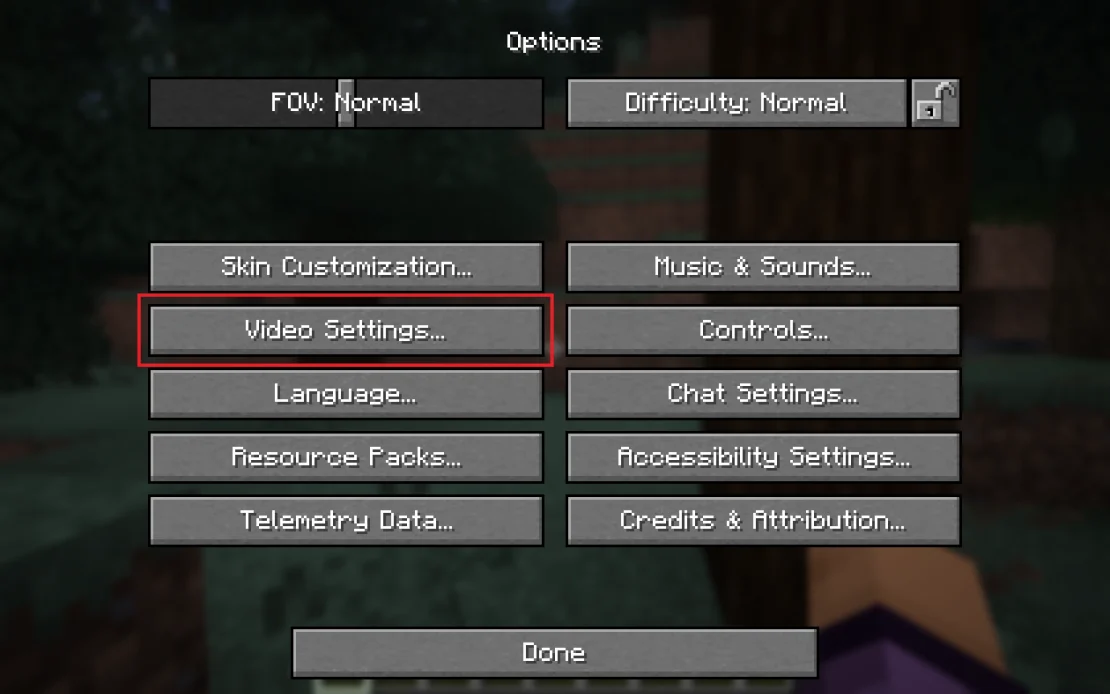
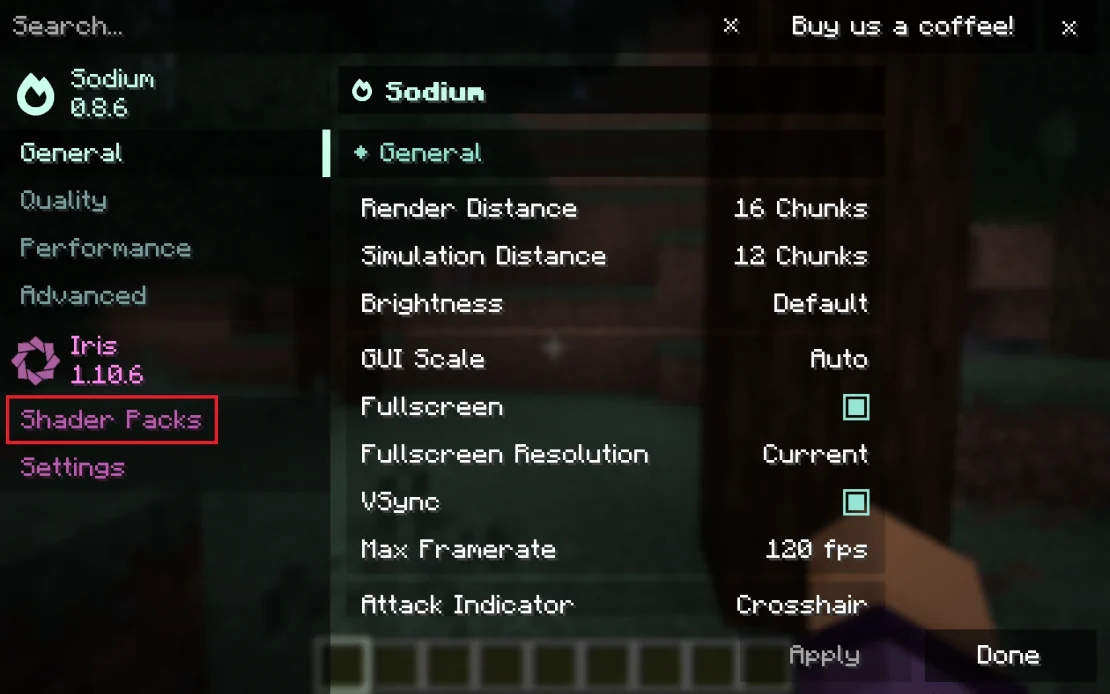
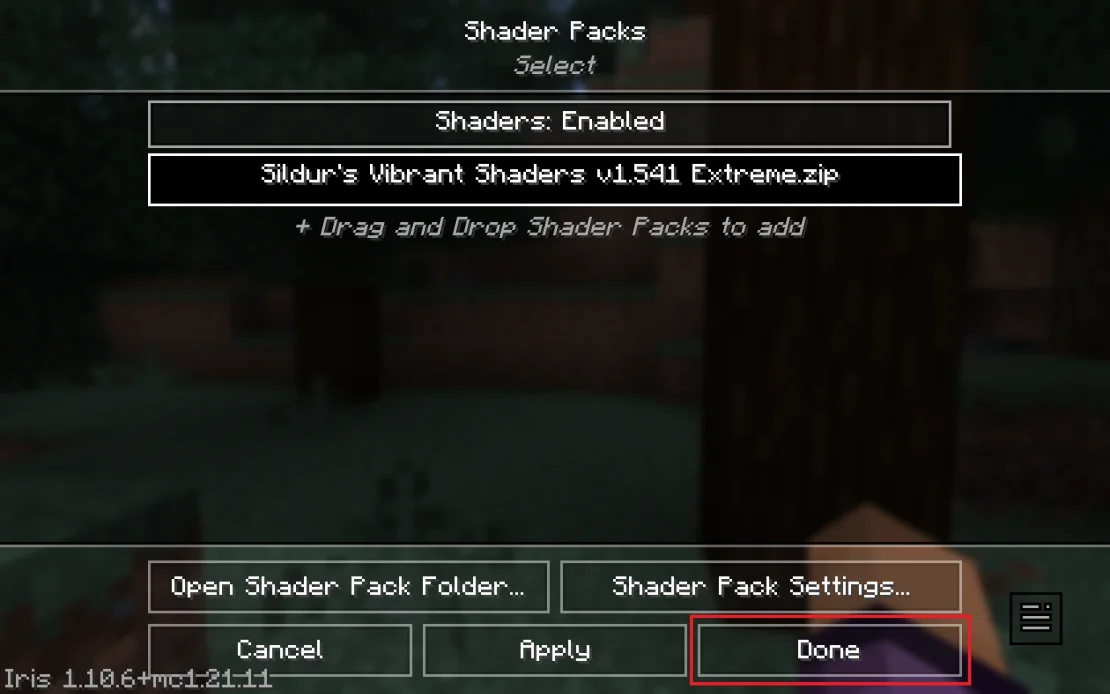
4. Go to Shader Packs.
5. If the Shaders option is disabled, switch it so the status becomes Enabled. Then select the shader you want to use to activate it.
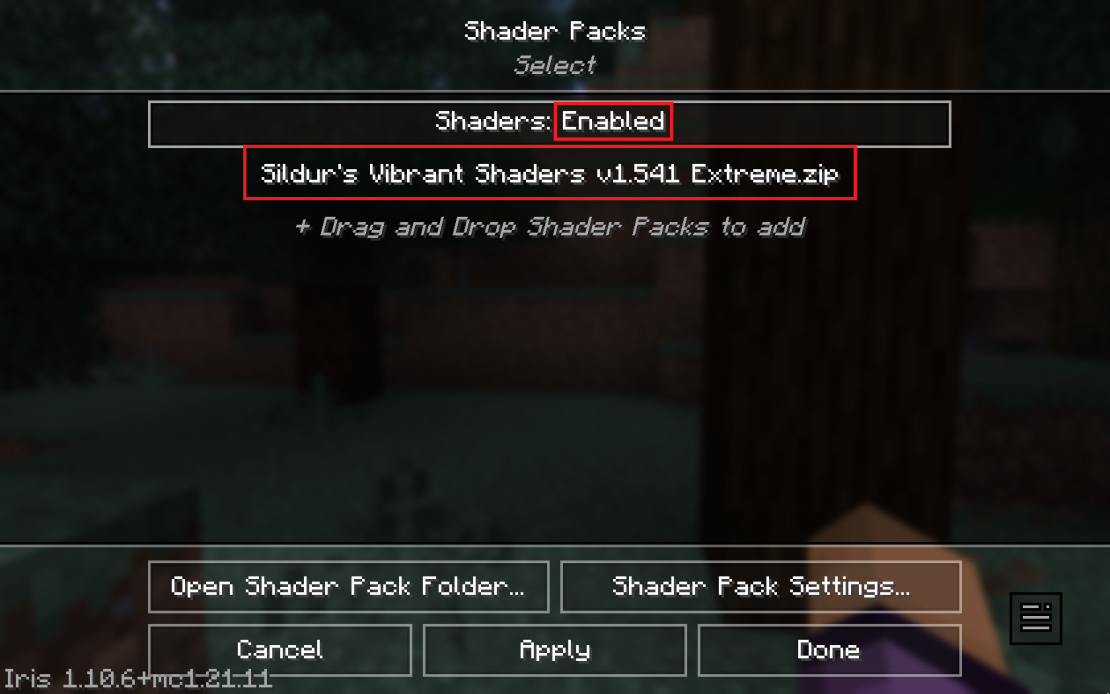
6. Click Done.
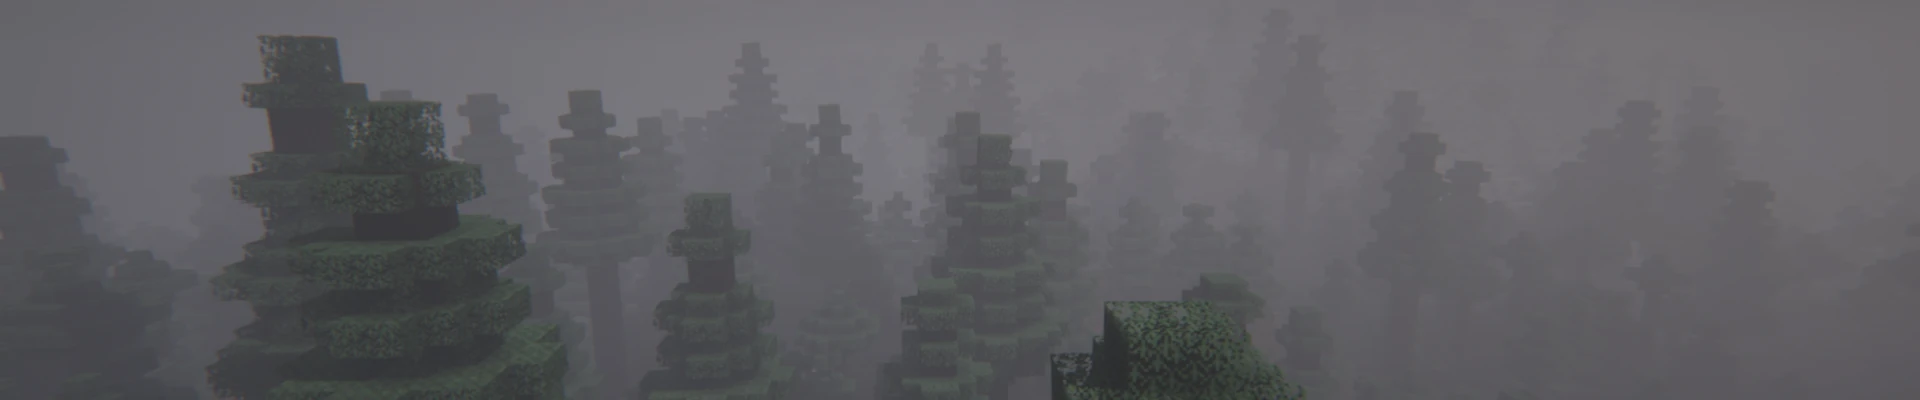
When enabling a shader, the game may freeze for a short moment. After this brief loading time, you will be able to enjoy the epic visuals in your Minecraft world.
If you want to enjoy stunning views with your friends, renting a Minecraft server can be a great idea. With your own server, you will be able to create shared projects and build your world exactly the way you want.
