


This guide explains how to configure a whitelist on a Project Zomboid server to have full control over who can join your gameplay. A whitelist is the most popular way to protect a server from unwanted players, allowing you to create a closed community for a selected group of users while still easily managing access by adding or removing players at any time.
How to Whitelist Your Project Zomboid Server
1. Go to the control panel and Stop server.
2. Go to the Files and follow this path:
/home/container/?/Zomboid/Server/main.ini
3. Edit file and find Open= option. Set the value to:
Open=false
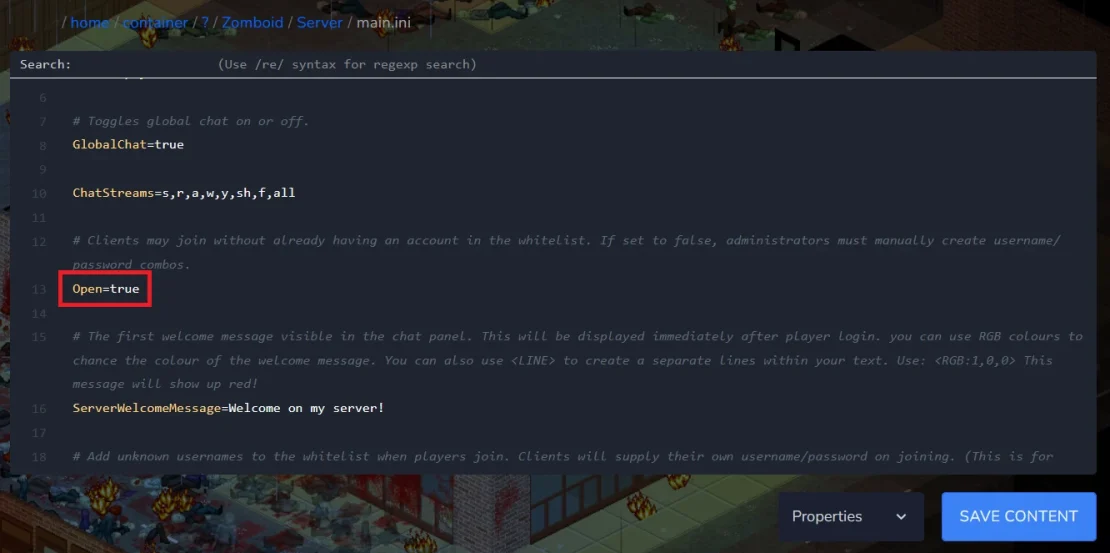
4. Save the file and Start your project Zomboid server.
5. Go to the Console and use the following command:
AddUser [username] [password][username] must be replaced with the username of the person you want to add to the whitelist, and [password] with the password that person will use to log in to the server.
If you decide to remove a user from the whitelist, use this command:
RemoveUserFromWhitelist [username]We hope that our intuitive web interface has allowed you to manage your Project Zomboid server easily. If you want to ask us any questions, feel free to contact us via e-mail, ticket or live chat!
