


This article explains how to create a private Project Zomboid server in three ways: by setting a server password, enabling a whitelist, and disabling the Public option. With these methods, you can effectively restrict access to your server and protect it from unwanted players.
Set a Server Password
Setting a server password is the easiest way to make your Project Zomboid server private. With a password enabled, only players who know it will be able to join the game, effectively blocking random users. This solution works great for playing with friends and can easily be combined with other server security methods.
Here’s what you need to do to protect your Project Zomboid server with a password:
1. Go to your control panel, open the Console, and click Stop to shut down the server.
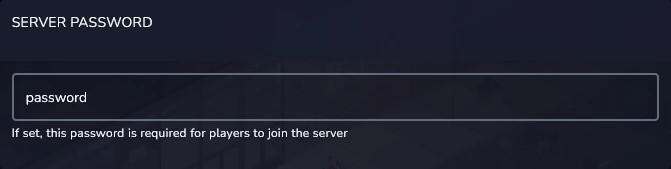
2. Go to Startup and find the Server Password option – enter your desired password in this field.
3. Return to the Console and click Start to launch the server.
Enable Server Whitelist
Enabling a whitelist restricts access to the Project Zomboid server exclusively to selected players who are manually added by the administrator. This is an ideal solution for closed groups that want full control over who can join the game.
To enable a whitelist on a Project Zomboid server, you need to:
1. Go to your control panel, open the Console, and click Stop to shut down the server.
2. Go to the Files and follow this path: /home/container/?/Zomboid/Server/main.ini
3. Edit file and find Open= option. Set the value to false (Open=false) and save changes.
4. Start server.
5. Use the server console command to add a user to the whitelist ([username] should be replaced with the chosen user’s username, and [password] will be their login password).
AddUser [username] [password]Hide the Server from Public Listings
Disabling the Public option is an effective way to increase the privacy of your Project Zomboid server, because when this option is turned off, the server will not appear on the Steam server list (which, when Public is enabled, allows random players to find it). Disabling this option ensures that only players who know the server address will be able to join.
To disable the Public option, you need to:
1. Go to your control panel, open the Console, and click Stop to shut down the server.
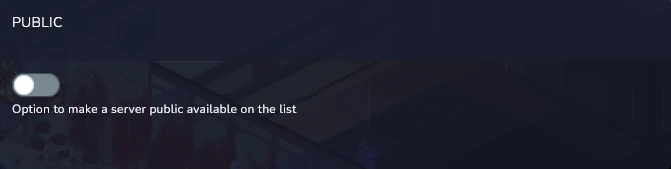
2. Go to Startup, find the Public option and turn it off.
3. Return to the Console and click Start to launch the server.
We hope that our intuitive web interface has allowed you to manage your Project Zomboid server easily. If you want to ask us any questions, feel free to contact us via e-mail, ticket or live chat!
