


Farming in Project Zomboid may seem complicated at first, especially after the changes introduced in the latest versions of the game. Understanding how crops grow, how to take care of them, and how to deal with diseases is essential for long-term survival. In this guide, we will explain how farming works in Project Zomboid, from planting crops to their care and harvesting.
How to Grow Crops in Project Zomboid
Choosing the Right Location
Choosing the right location is the most important part of growing crops in Project Zomboid. Crops must be planted outdoors, at ground level, and only on grass or dirt tiles. Areas with high zombie traffic should be avoided, as zombies can walk over farm plots and destroy crops. It is best to plan your farm in a quiet, secured location near your base.
Preparing the Soil
Before planting crops, you must prepare the soil by digging furrows. The safest way to do this is by using a gardening trowel or a shovel. You can also dig furrows by hand, but this carries a risk of injury.
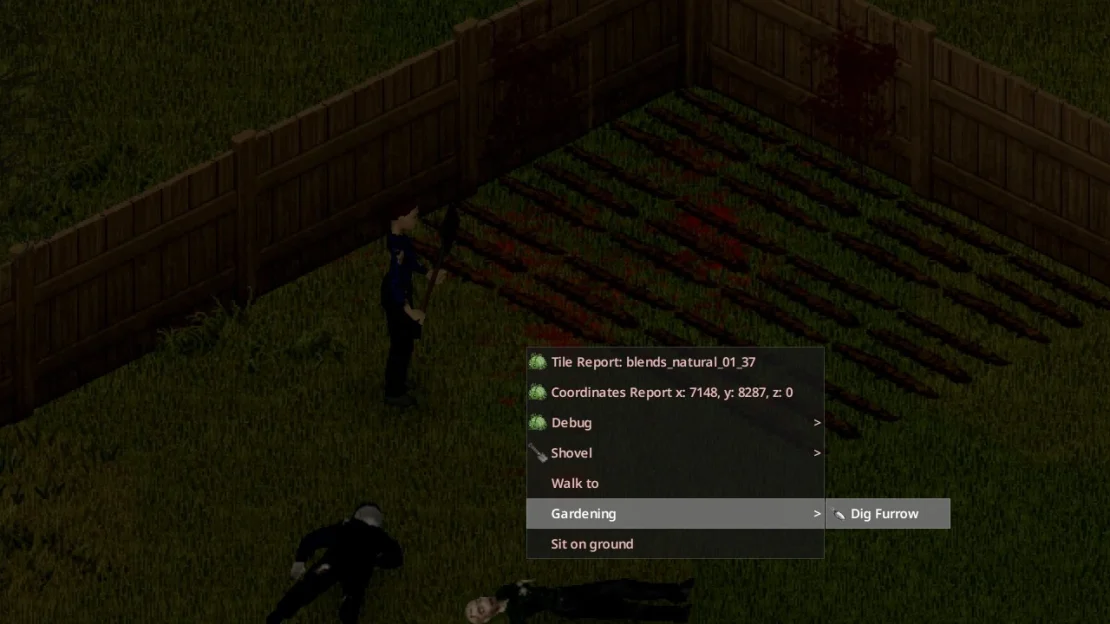
Planting Seeds
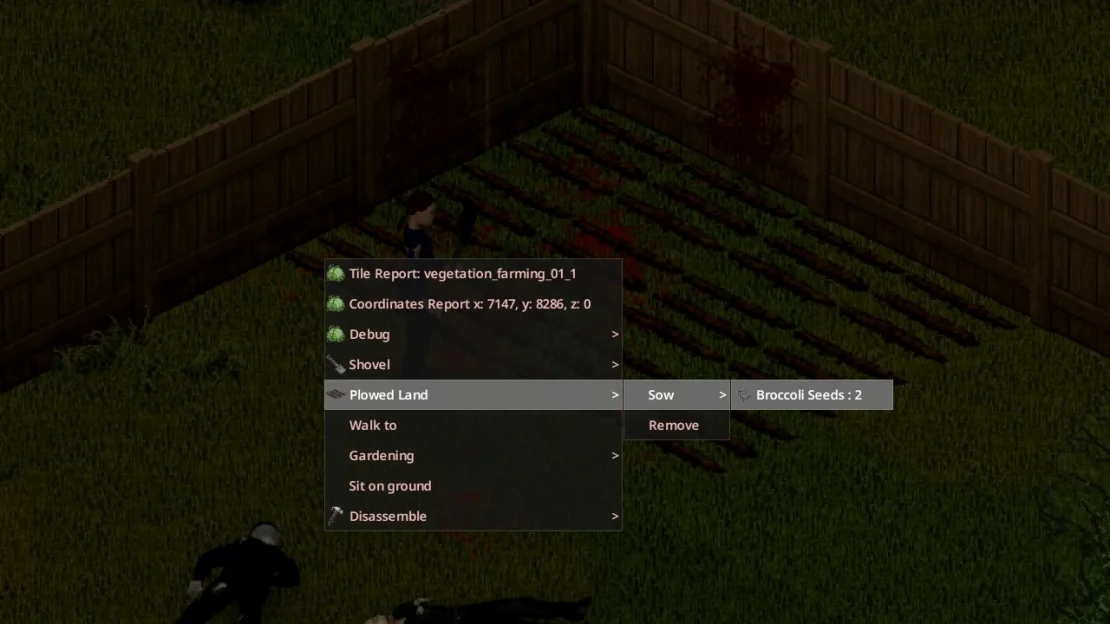
To plant crops, you need seeds, which can be found while searching houses, sheds, warehouses, farms, and gardening stores. Seeds can also be obtained from your own crops, as long as the plant allows seed recovery. After preparing a furrow, right-click on it and select Plowed Land, then Sow, and finally choose the type of seeds you want to plant.
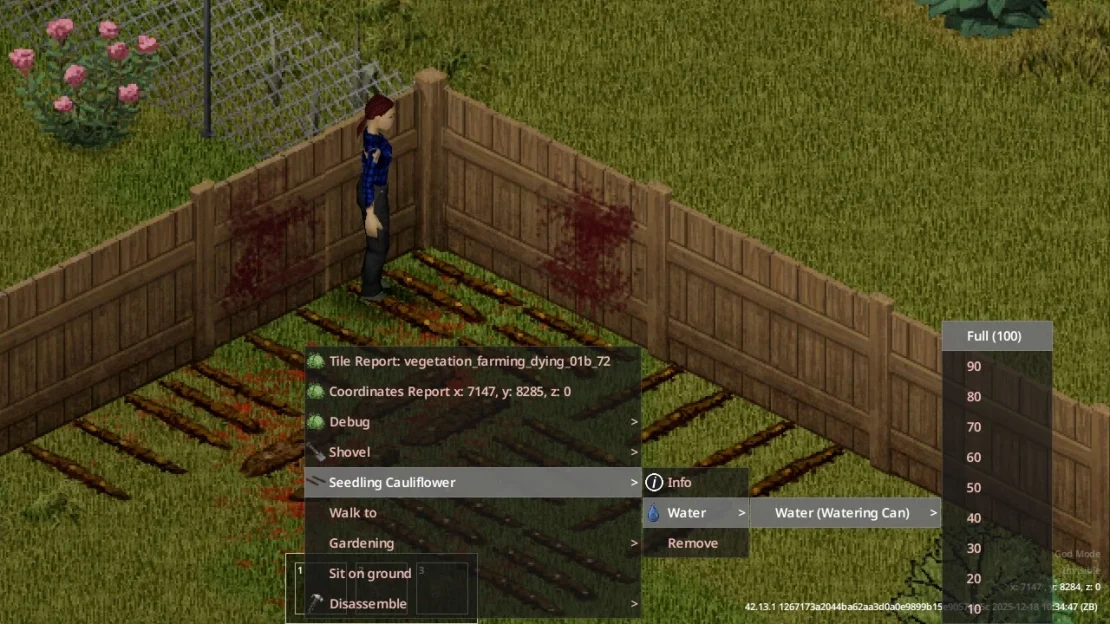
Watering Crops
After planting seeds, crops must be watered so they can start growing. To water crops, right-click on the furrow and select Seeding [crop name], then Water, choose a water source, and set the hydration range. Each plant has a specific hydration range displayed as a percentage – an incorrect value can cause the crop to become diseased. A good tool for watering is a watering can, which can be refilled for example in a kitchen sink.
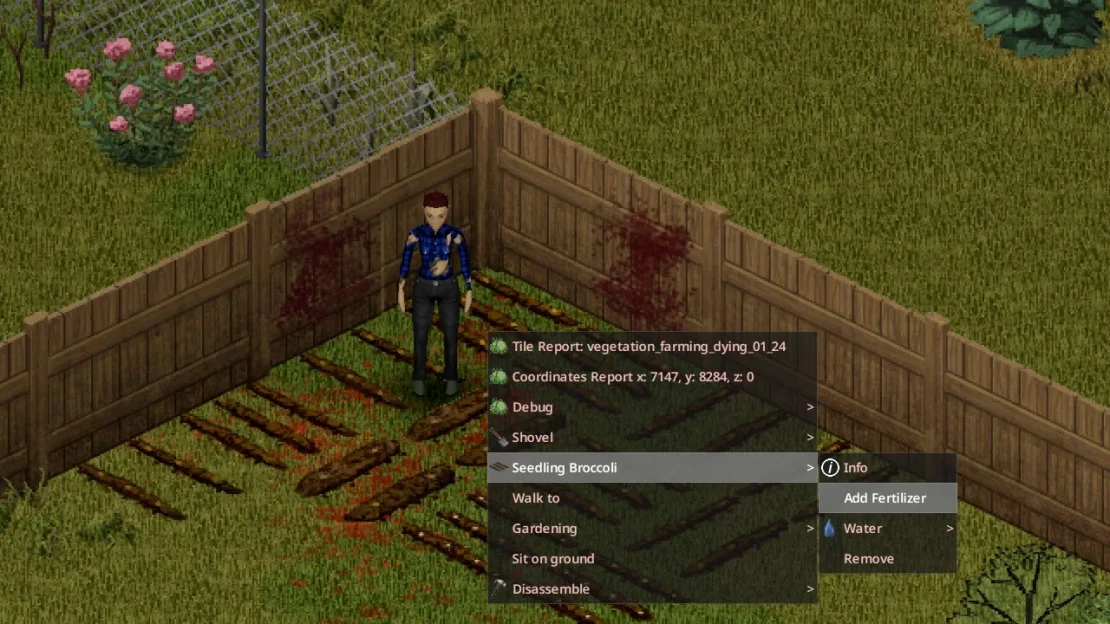
Fertilizer and Compost
To add Fertilizer to your furrow, select Seeding [crop name] and then choose Add Fertilizer. Fertilizing is not required, but it can help produce better yields and reduce the risk of problems during crop growth. Fertilizer can be obtained from a composter, where organic leftovers such as spoiled food and other biological waste can be placed. After some time, the composter produces compost, which can be used to enrich your farm plots.
Growth Stages Explained
Plants in Project Zomboid go through several growth stages, and each stage determines the current state of the crop:
- Seedling – the plant has just started growing after being planted.
- Young – the plant is beginning to take shape but is still too young to be harvested.
- Almost Ready to Harvest – the plant is close to full maturity.
- Ready to Harvest – the plant has reached maturity and can be harvested. It provides food but does not always allow seed recovery.
- Blooming – the best moment to harvest. The plant provides maximum yield, and only in this stage do most crops allow you to collect seeds.
Diseases
Plants in Project Zomboid can become infected by mildew, flies, slugs, and aphids. Diseases appear randomly as crops progress through their growth stages. Untreated diseases worsen over time, which can slow down plant growth or eventually lead to the crop dying. They can be cured using certain player-crafted items such as Mildew Spray or Pest Flies Spray. Slugs are an exception and cannot be treated with sprays; the only way to remove them is by using Slug Repellent, which can be found in the game world.
How to Harvest Crops in Project Zomboid
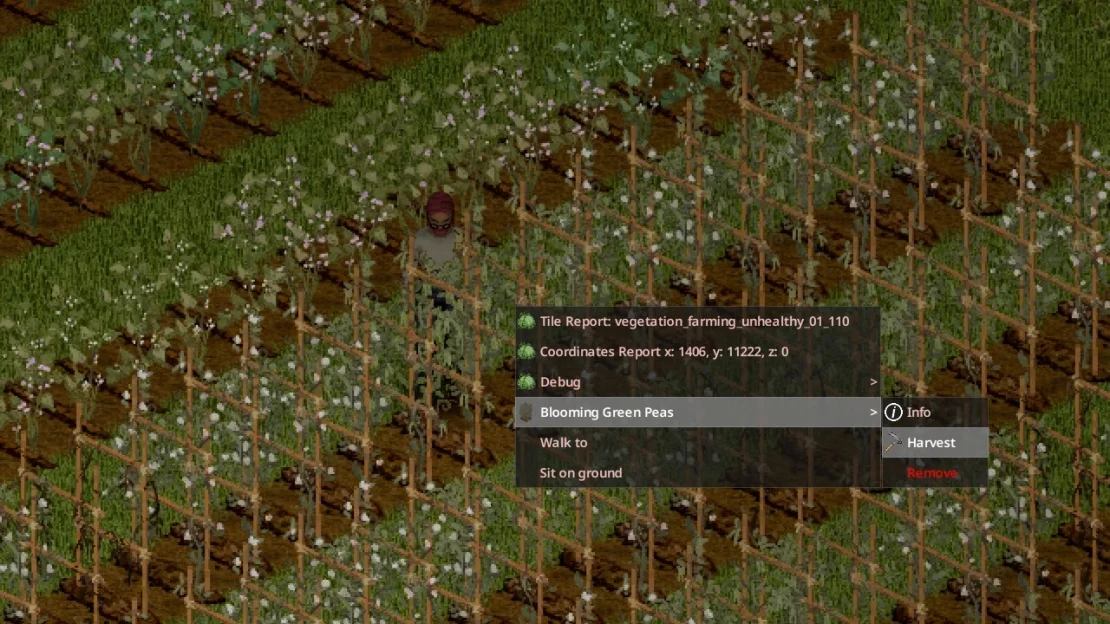
To harvest crops in Project Zomboid, right-click on the plant and select for example Blooming [crop name], then choose Harvest. Harvesting a plant at the highest stage, Blooming, provides the best yields and seeds, but it can also be harvested earlier at the Ready to Harvest stage. If the plant is not harvested in time, it may start to rot and will be lost.
How Long Do Crops Take to Grow
Below you will find all available crops that can be planted in Project Zomboid, along with the time it takes for them to be ready for harvest.
- Barley – 108
- Basil – 60
- Bell Pepper – 60
- Black Sage – 60
- Broadleaf Plantain – 60
- Broccoli – 60
- Cabbage – 60
- Carrots – 90
- Cauliflower – 60
- Chamomile – 60
- Chives – 60
- Cilantro – 60
- Comfrey – 60
- Common Mallow – 60
- Corn – 90
- Cucumber – 90
- Flax – 108
- Garlic – 240
- Green Peas – 60
- Habanero – 60
- Hemp – 240
- Hops – 240
- Jalapeno – 60
- Kale – 60
- Lavender – 60
- Leek – 150
- Lemongrass – 60
- Lettuce – 60
- Marigold – 60
- Mint – 60
- Onion – 90
- Oregano – 60
- Parsley – 60
- Poppy – 60
- Potato – 90
- Pumpkin – 90
- Radish – 30
- Rosemary – 180
- Rose – 60
- Rye – 108
- Sage – 90
- Soybeans – 90
- Spinach – 60
- Strawberry – 90
- Sugar Beet – 60
- Sunflower – 90
- Sweet Potato – 90
- Thyme – 60
- Tobacco – 180
- Tomato – 90
- Turnip – 60
- Watermelon – 90
- Wild Garlic – 240
- Winter Wheat – 108
- Zucchini – 90
