


As a Rust server administrator, you can set up two images to personalize and distinguish your server. Server Image is a larger picture that appears on the server list, helping to attract players’ attention and improve recognition. The Server Logo is a smaller graphic that also aids in identification. In this article, we will explain how to set both images in our game server panel.
How to change server image and logo
1. Navigate “Files” tab in your server
First, you need to get access to Rust server files. Go to server panel. You should see your server list – find Rust server and click on it. Navigate “Files” tab.
2. Enter server.cfg file
Once you are in a “Files” tab, you need to open server.cfg file. Follow this path to find appropriate file: /home/container/server/rust/cfg/server.cfg
3. Add server image
Paste following line into server.cfg file to add server image:
server.headerimage "<your_link>"4. Add server logo
Paste following line into server.cfg file to add server logo:
server.logoimage "<your_link>"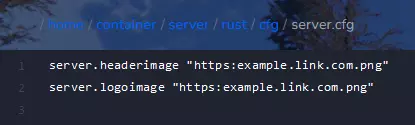
Remember to change “your_link” to a link leading to the image you selected!
5. Save changes
Click on “SAVE CONTENT” to save previously done changes.
6. Restart your server
Navigate “Console” tab and click on “Restart” button to restart your server.
We hope that our intuitive web interface has allowed you to manage your Rust server easily. If you want to ask us any questions, feel free to contact us via e-mail, ticket or live chat!
This tutorial will show you how to change Rust server image/logo